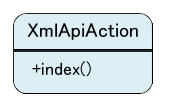
ボトムアップ方式による分割の例
それではいよいよコード分割の過程を見ていきましょう。ここではボトムアップ方式でコードを分割していきます。
例で使用するコードは、
<?xml version="1.0" encoding="UTF-8"?>
<data>
  <divisions>
    <division index="1">
      <id>1001</id>
      <name>div1</name>
    </division>
   <division index="2">
      <id>1002</id>
     <name>div2</name>
   </division>
   ...
  </divisions>
  <users>
    <user index="12">
      <name>user1</name>
    </user>
    <user index="13">
      <name>user2</name>
    </user>
    ...
  </users>
</data>
Step1:ベタなコードで書いてみる
まずベタに処理を実装してみます。完成したコードはリスト2、
@Path("api/step1")
public class XmlApiAction extends Action {
    public HttpServletResponse response;
    public UserService userService;
    public ActionResult index() throws Exception {
        List<Division> divs = userService.getDivisions();
        List<User> users = userService.getUsers();
        int rowIndex = 1;
        // ①XMLを作成するためにDocumentオブジェクトを準備
        DocumentBuilderFactory factory =
            DocumentBuilderFactory.newInstance();
        DocumentBuilder builder = factory.newDocumentBuilder();
        Document doc = builder.newDocument();
        // ②ルート要素の追加
        Element rootNode = doc.createElement("data");
        doc.appendChild(rootNode);
        // ③組織要素の追加
        Element divisionsNode = doc.createElement("divisions");
        int rowIndex = 1;
        for (Division div: divs) {
            Element node = doc.createElement("division");
            node.setAttribute("index", String.valueOf(rowIndex++));
            Element idNode = doc.createElement("id");
            idNode.setTextContent(div.getId());
            node.appendChild(idNode);
            Element nameNode = doc.createElement("name");
            nameNode.setTextContent(div.getName());
            node.appendChild(nameNode);
            divisionsNode.appendChild(node);
        }
        rootNode.appendChild(divisionsNode);
        // ④ユーザ要素の追加
        Element usersNode = doc.createElement("users");
        for (User user : users) {
            Element node = doc.createElement("user");
            node.setAttribute("index", String.valueOf(rowIndex++));
            Element nameNode = doc.createElement("name");
            nameNode.setTextContent(user.getName());
            node.appendChild(nameNode);
            usersNode.appendChild(node);
        }
        rootNode.appendChild(usersNode);
        // ⑤DocumentオブジェクトをXML文字列への変換
        TransformerFactory transFactory =
            TransformerFactory.newInstance();
        Transformer transformer = transFactory.newTransformer();
        DOMSource source = new DOMSource(doc);
        // ⑦レスポンスにXMLを出力
        StreamResult result =
            new StreamResult(response.getOutputStream());
        transformer.transform(source, result);
        return new Direct();
    }
}
①でXMLを作成する準備としてDocumentオブジェクトを作成しています。JavaではDOM
比較的単純な処理なのでこれでも問題なさそうですが、
- 要素を作成する部分など共通的な処理をメソッド抽出することで、
可読性が高まる部分がある - 一部でしか使用していないのにスコープが長い変数
(factory、 builder、 rootNodeなど) が存在する - 1メソッドのコードが長いため、
処理の流れや全体像を把握しにくい
それでは、


