


前回は、
Worker Nodeの種類 ─Public Worker NodeとPrivate Worker Node
DCOSで実際にアプリケーションを動作させるノードをWorker Nodeと呼び、
Private Worker Nodeは内部ネットワークのIPアドレスだけが割り当てられ、
Public Worker Node、
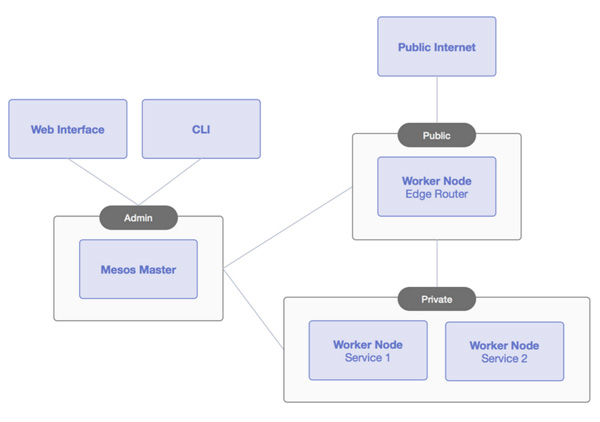
通常DCOSでアプリケーションの動作を開始すると、
しかし、
また、
アプリケーションの実行方法
DCOSでのアプリケーション実行方法は大きく分けて2種類あります。
- DCOSアプリケーションリポジトリにあるアプリケーションの実行
- 独自アプリケーションの実行
DCOSアプリケーションリポジトリにあるアプリケーションの実行は非常に簡単で、”
DCOSアプリケーションリポジトリにない独自アプリケーションも、
DCOSアプリケーションリポジトリ
DCOSの大きな特長の1つが、
- Marathon
- Chronos
- Apache Spark
- Apache Kafka
- Kubernetes
- HDFS
- Apache Cassandra
アプリケーションリポジトリ自体はGitHub上でメンテナンスされており、
- ※)
- DCOSのリファレンスページで現在利用可能なアプリケーションと、
計画中のアプリケーションの一覧を見ることができます。
アプリケーション例① Apache Spark
1つめの例がApache Sparkです。Apache SparkはDCOSアプリケーションリポジトリに登録されているアプリケーションで、
$ dcos package install spark
同様にDCOSアプリケーションリポジトリに登録されているアプリケーションは、”
アプリケーション例② スクリプト
次に簡単なPythonスクリプトを動作させてみましょう。DCOSのWorker NodeにはPython3が標準で入っていますので、
以下が実際に動作させるPythonスクリプトです。10秒sleepして経過時間を標準出力に書き出します。
#!/usr/bin/env python3
import time
start = time.time()
time.sleep(10)
end = time.time()
elapsed = end - start
print("elapsed: ", elapsed)
DCOSはWorker Nodeへのデータの受け渡しにhttpを使います。今回は上記のスクリプトをgistに置き、
最後にDCOSにジョブとして投入するためのJSON定義ファイルを作成します。
{
    "id": "python-sleep",
    "cmd": "chmod u+x test.py && ./test.py",
    "cpus": 0.1,
    "mem": 10.0,
    "instances": 1,
    "uris": [    "https://gist.githubusercontent.com/mkiuchi/b59989d37f65b1823994/raw/41412a57384a9ed6adb35800c5aa483419e67e41/test.py"
    ]
}
最後にdcosコマンドでDCOSクラスタにジョブとして投入します
$ dcos marathon app add python-sleep.json
DCOS GUIの左側の[Services]を選択すると、

“marathon”
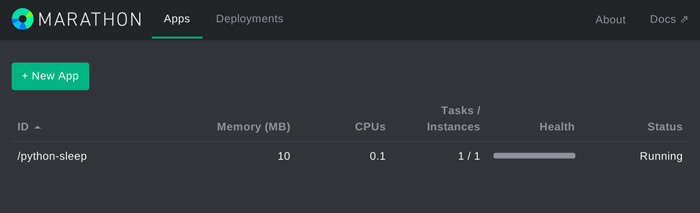
DCOS GUIのURLを”
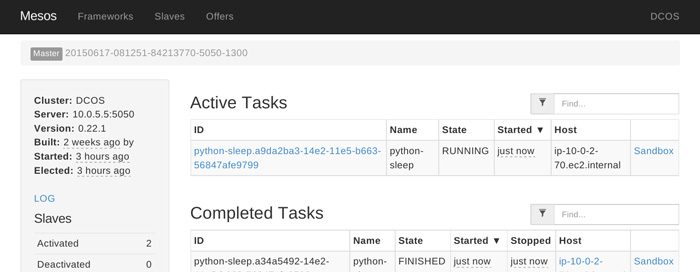
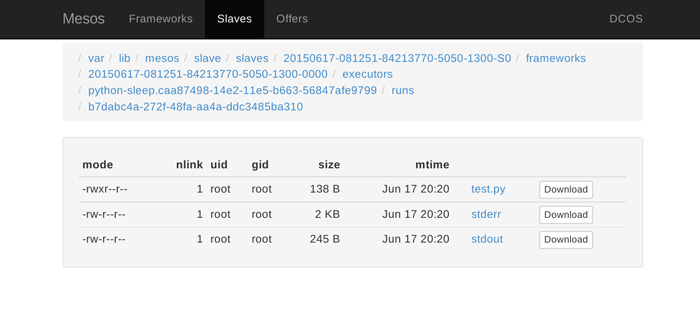
各ジョブの右側の”


marathonはスクリプトが終了すると自動的に起動しなおすため、
$ dcos marathon app remove /python-sleep
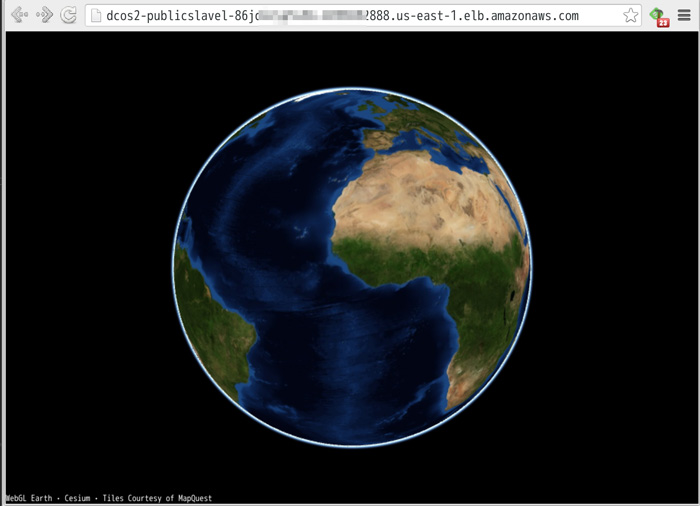
アプリケーション例③ Dockerコンテナと連携したアプリケーション
DCOSはDockerと連携することで、
以下のファイルが、
{
 "container": {
   "type": "DOCKER",
   "docker": {
     "network": "BRIDGE",
     "portMappings": [
        { "containerPort": 80, "hostPort": 80 }
     ],
     "image": "mkiuchi/webglearth"
   }
 },
 "acceptedResourceRoles": ["slave_public"],
 "ports": [80],
 "requirePorts": true,
 "id": "webgl-earth",
 "cpus": 0.01,
 "mem": 256
}
DCOS CLIからこのJSONファイルを使ってジョブを投入します。
$ dcos marathon app add webgl-earth.json
1~2分ほど待ってからMarathonの管理インターフェイスを見ると、
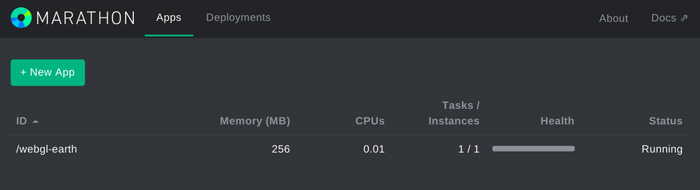
AWS-CloudFoundation管理コンソールの[Output]タブを選択し、”
成功すると、
アプリケーションを終了するにはDCOS CLIから以下のようにコマンドを実行します
$ dcos marathon app remove /webgl-earth
さいごに
DCOSを使うことで、
現在DCOS Community EditionはAWS上での動作に限られていますが、
弊社ではDCOSの普及及び具体的な事例に即したコンサルテーションを行っています。ご興味がありましたらぜひ sales@creationline.