Eclipse RAPアプリケーションの開発
Eclipseの準備
Eclipse RAPのアプリケーション開発には、
- Eclipse IDE for Java EE Developers
- Eclipse for RCP/
Plug-in Developers - Eclipse Classic 3.
4
今回はEclipse 3.
Eclipse RAPの入手と設定
ダウンロード
先ほどのEclipseのパッケージに加え、
にWebブラウザでアクセスし、
プラグインのインストール
Eclipse 3.
- ①[Help]メニューから[Software Updates]メニューを選択し、
Software Updates and Add-onsダイアログを表示させる - ②[Available Software]を選択にして[Add Site]ボタンを押下する
- ③[Location]フィールドに次のURLを入力する
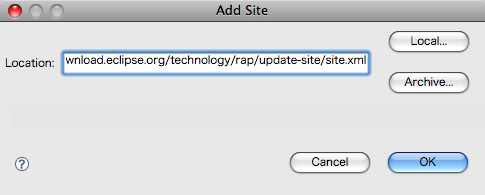
[OK]ボタンを押下するとUpdate Siteにアクセスし、
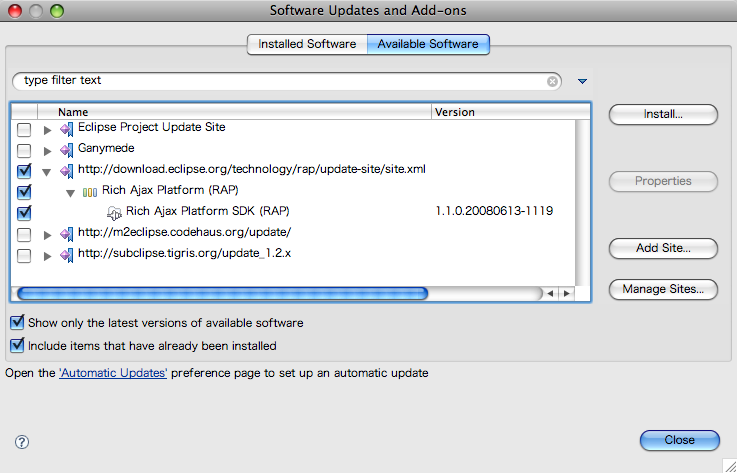
Eclipseの再起動後、
- ①Eclipseのメニューから[Eclipse] -> [Preferences]を選択し、
設定ダイアログを開く - ②左の欄にある[Plug-in Development]項目中の[Target Platform]を選択する
- ③右上にある[Browse]ボタンを押下して、
先ほど展開したeclipseディレクトリを選択する
すると、
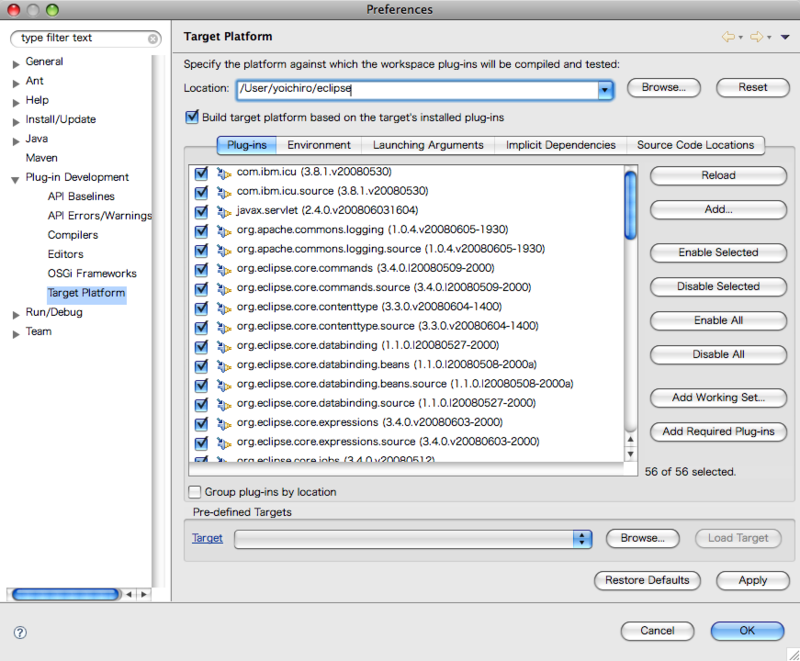
Eclipse RAPプロジェクトの作成
開発環境が整ったところで、
まずはプロジェクトを作成します。先ほどインストールしたRAP SDKプラグインによって、
- ①Eclipseの[File] -> [New] -> [Project]を選択し、
新規プロジェクト作成ウィザードを開く - ②「Plug-in Project」
を選択し、 [Next]ボタンを押下する - ③「Project name」
欄にプロジェクト名を入力して[Next]ボタンを押下する。ここではプロジェクト名を 「rap-sample」 としておく - ④「Rich Client Application」
のYes/ Noの選択が 「No」 であることを確認し、 [Next]ボタンを押下する。ここでプロジェクトのテンプレートが選べ、 その中には先ほど紹介した 「RAP Application with a View」 が出てきているのでそれを選択して[Finish]ボタンを押下する
Eclipse RAPアプリケーションの実行
テンプレートをもとにして作成したプロジェクトは、
Webブラウザ内に表示されたウィンドウは、
WebブラウザとしてFirefoxをご利用の方は、
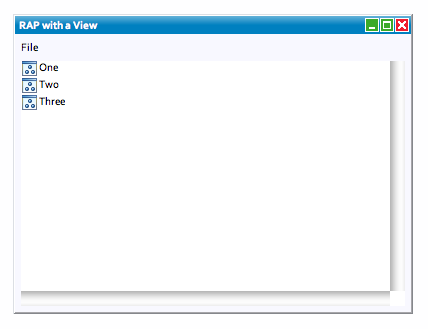
サンプルアプリケーションのコード
では、
プロジェクトを作成した際に選択した
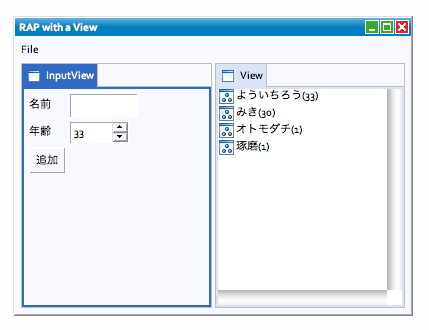
情報入力ビューの追加
まず、
package rap_sample;

import org.eclipse.jface.dialogs.*;  ---①
import org.eclipse.swt.*;
import org.eclipse.swt.events.*;
import org.eclipse.swt.layout.*;
import org.eclipse.swt.widgets.*;
import org.eclipse.ui.part.*;

public class InputView extends ViewPart {
    public static final String ID = "rap_sample.view.input";
    private Text text;
    private Spinner spinner;

    public void createPartControl(Composite parent) {
        GridLayout layout = new GridLayout();  ---②
        layout.numColumns = 2;
        parent.setLayout(layout);
        Label label = new Label(parent, SWT.NONE);
        label.setText("名前");
        text = new Text(parent, SWT.SINGLE | SWT.BORDER);
        label = new Label(parent, SWT.NONE);
        label.setText("年齢");
        spinner = new Spinner(parent, SWT.BORDER);
        spinner.setMinimum(0);
        spinner.setMaximum(120);
        spinner.setSelection(33);
        Button button = new Button(parent, SWT.PUSH);
        button.setText("追加"); }
        button.addSelectionListener(new SelectionListener() {  ---③
            public void widgetDefaultSelected(SelectionEvent e) {
            }
            public void widgetSelected(SelectionEvent e) {
                String name = text.getText();
                if (name == null || name.length() == 0) {  ----④
                    MessageDialog.openError(getSite().getShell(), "エラー", "名前を入力してください");
                } else {
                    String person = name + "(" + spinner.getSelection() + ")";
                    Activator activator = Activator.getDefault();
                    activator.addPerson(person);  ---⑤
                }
            }
        });
    }

    public void setFocus() {
        text.setFocus();
    }
}
①のimport文を見ると、
②はラベルやテキストフィールド、
登録された[追加]ボタンが押されたときの処理は、
Webブラウザ上のテキストフィールドに入力された値は、
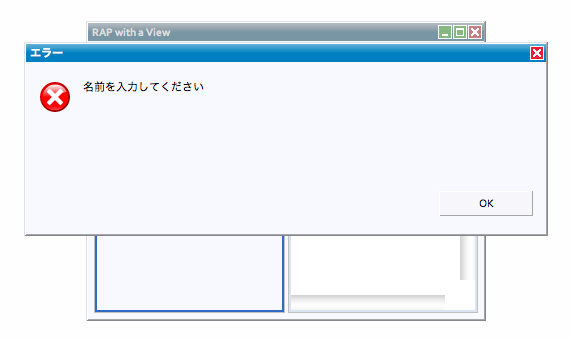
ちゃんと入力されていれば、
このInputViewビュークラスを実際に利用するためには、
この記述により、
<view
      name="InputView"
      class="sample.InputView"
      id="rap_sample.view.input">
</view>
Eclipseに登録されたビューはパースペクティブに追加して表示します。パースペクティブ内をどのようなビューで構成するかはPerspectiveクラスで指定します。今回のサンプルでは2つのビューを登録しますので、
・修正前
layout.addStandaloneView(View.ID, false, IPageLayout.LEFT, 1.0f, editorArea);
・修正後
layout.addView(InputView.ID, IPageLayout.LEFT, 0.5f, editorArea);
layout.addView(View.ID, IPageLayout.LEFT, 0.5f, editorArea);先ほど作成したInputViewビューとテンプレートに含まれているViewビューを横に均等に並べて、
Activatorクラスの修正
情報入力ビューで入力された情報
Activatorクラスは、
今回の題材では、
private List people = new ArrayList();

public String[] getPeople() {
    return people.toArray(new String[0]);
}

public void addPerson(String person) {
    people.add(person);
    getView().refresh();
}

private View getView() {
    IViewReference[] viewReferences =
        PlatformUI.getWorkbench().getActiveWorkbenchWindow().getActivePage().getViewReferences();
    for (IViewReference viewReference : viewReferences) {
        if (viewReference.getId().equals(View.ID)) {
            return (View)viewReference.getView(true);
        }
    }
    throw new RuntimeException();
}
Viewクラスの修正
最後に、
・変更前
public Object[] getElements(Object parent) {
    return new String[] { "One", "Two", "Three" };
}・変更後
public Object[] getElements(Object parent) {
return Activator.getDefault().getPeople();
}・追加
public void refresh() {
viewer.refresh();
}Activatorクラスのインスタンスを取得し、
このrefresh( )メソッドは、
まとめ
Eclipse RAPを使えば、
なお、
