JavaFX Scene BuilderによるUIの構築
前回は、
NetBeansで

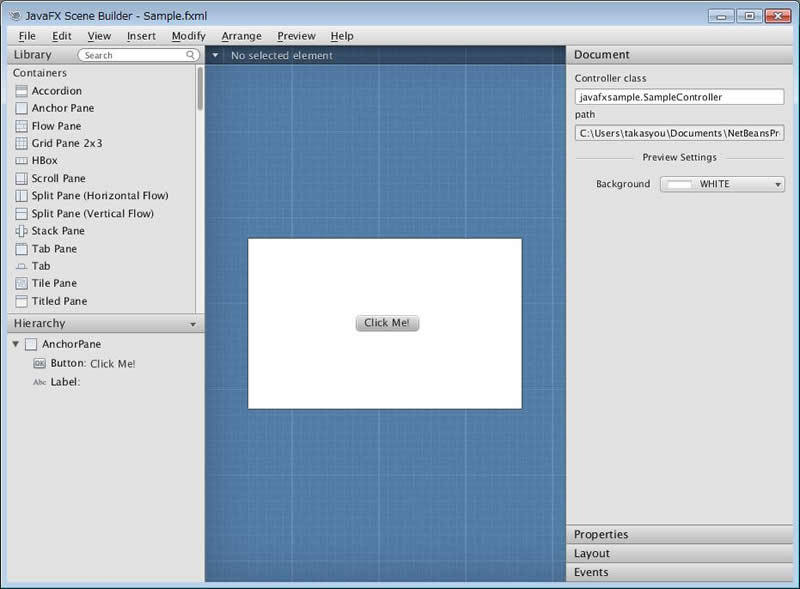
左下のHierarchyパネルを見るとわかるように、
各ノードのプロパティやレイアウトの設定は、

Buttonのレイアウトは図3のようになっています。AnchorPaneなので、

このように、
Sample.


次に、
<?xml version="1.0" encoding="UTF-8"?>

<?import java.lang.*?>
<?import java.util.*?>
<?import javafx.scene.*?>
<?import javafx.scene.control.*?>
<?import javafx.scene.layout.*?>

<AnchorPane id="AnchorPane"
	    prefHeight="200" prefWidth="320"
	    xmlns:fx="http://javafx.com/fxml"
	    fx:controller="javafxapplication5.SampleController">
  <children>

    <Button layoutX="126" layoutY="90" text="Click Me!"
	    onAction="#handleButtonAction" fx:id="button" />
    <Label layoutX="126" layoutY="120"
	   minHeight="16" minWidth="69" fx:id="label" />

  </children>
</AnchorPane>
JavaプログラムからのFXMLの利用
続いてJavaプログラムの方を確認してみましょう。まず、
package javafxsample;

import javafx.application.Application;
import javafx.fxml.FXMLLoader;
import javafx.scene.Parent;
import javafx.scene.Scene;
import javafx.stage.Stage;

public class JavaFXSample extends Application {
  @Override
  public void start(Stage stage) throws Exception {
    Parent root = FXMLLoader.load(getClass().getResource("Sample.fxml"));

    Scene scene = new Scene(root);

    stage.setScene(scene);
    stage.show();
  }

  public static void main(String[] args) {
    launch(args);
  }
}
JavaFXアプリケーションはApplicationクラスを継承して作成します。この仕組みはアプレットをAppletクラスを継承して作るのに似ています。アプリケーションはlaunch()メソッドで起動し、
FXMLを使う場合には、
次にコントローラのコードですが、
package javafxapplication5;

import java.net.URL;
import java.util.ResourceBundle;
import javafx.event.ActionEvent;
import javafx.fxml.FXML;
import javafx.fxml.Initializable;
import javafx.scene.control.Label;

public class SampleController implements Initializable {
  @FXML
  private Label label;

  @FXML
  private void handleButtonAction(ActionEvent event) {
    System.out.println("You clicked me!");
    label.setText("Hello World!");
  }

  @Override
  public void initialize(URL url, ResourceBundle rb) {
    // TODO
  }
}
この例からも分かるように、
このアプリケーションを実行すると、


WebViewを使ってWebページを表示する
今度は、

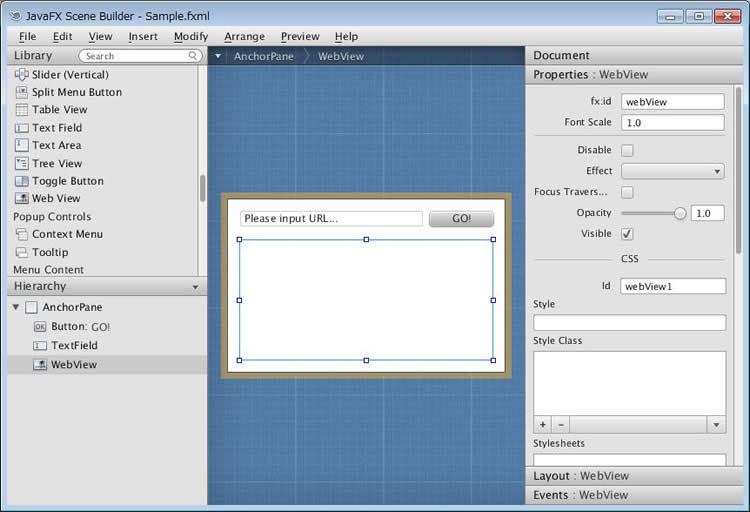
コンテナがAnchorPaneなので、

変更後のSample.
<?xml version="1.0" encoding="UTF-8"?>

<?import java.lang.*?>
<?import java.util.*?>
<?import javafx.scene.*?>
<?import javafx.scene.control.*?>
<?import javafx.scene.layout.*?>
<?import javafx.scene.web.*?>

<AnchorPane id="AnchorPane"
	    prefHeight="200.0" prefWidth="320.0"
	    xmlns:fx="http://javafx.com/fxml"
	    fx:controller="javafxsample.SampleController">
  <children>

    <Button fx:id="button" layoutY="14.0"
	    onAction="#handleButtonAction"
	    prefHeight="19.0" prefWidth="74.00009999999747"
	    text="GO!" AnchorPane.rightAnchor="13.0" />
    <TextField id="textField1" fx:id="urlField" layoutY="13.0"
	       prefHeight="20.0" prefWidth="212.0"
	       text="Please input URL..."
	       AnchorPane.leftAnchor="14.0" AnchorPane.rightAnchor="94.0" />
    <WebView id="webView1" fx:id="webView"
	     prefHeight="139.0" prefWidth="291.9998779296875"
	     AnchorPane.bottomAnchor="14.0" AnchorPane.leftAnchor="14.0"
	     AnchorPane.rightAnchor="14.0" AnchorPane.topAnchor="47.0" />
  </children>
</AnchorPane>
SampleController.
public class SampleController implements Initializable {
  @FXML
  private TextField urlField;
  @FXML
  private WebView webView;

  @FXML
  private void handleButtonAction(ActionEvent event) {
    String url = urlField.getText();
    webView.getEngine().load(url);
  }

  @Override
  public void initialize(URL url, ResourceBundle rb) {
    // TODO
  }
}
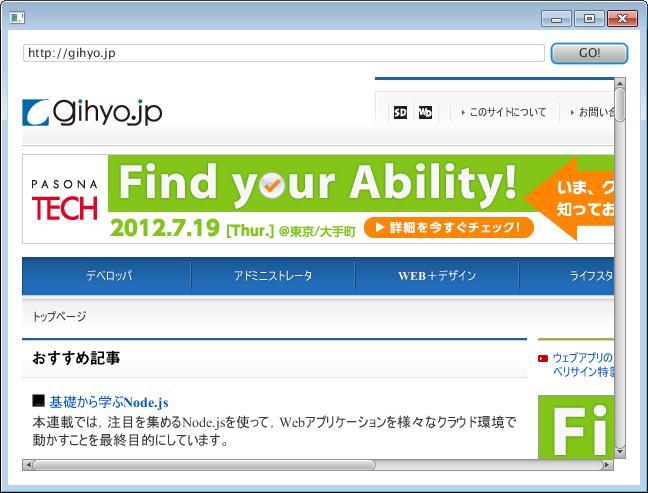
TextFieldにURLを入力してButtonをクリックすると、
完成したら実行してみましょう。最初に図10のように表示され、
![図10 URLを入力して[GO!]ボタンをクリック 図10 URLを入力して[GO!]ボタンをクリック](/assets/images/dev/serial/01/engineer_toolbox/0037/010.jpg)

Scen Builderを使えば、


