Visual Web Developer 2010 Expressによる開発
今回は、
ただ、
そこで、
IISでPHPを動作させる
まず、
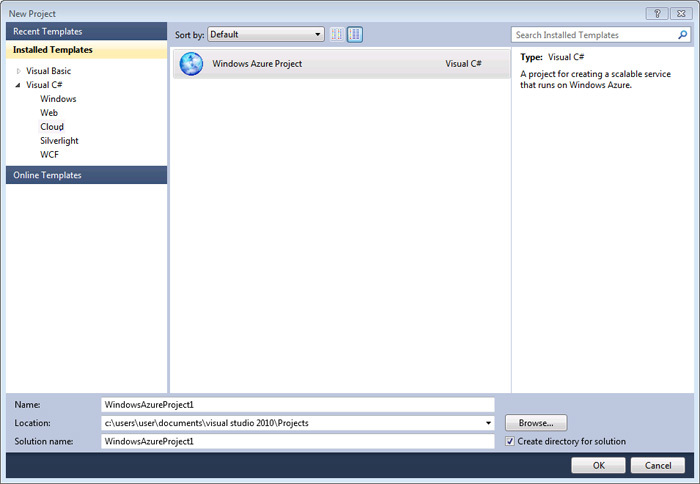
すると、
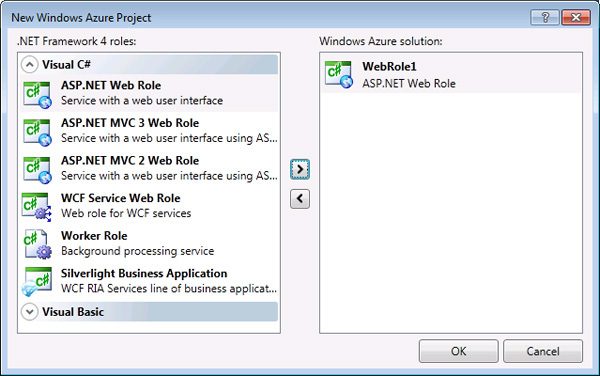
しばらくするとVWDの画面が表示されますので、
また、

フォルダをコピーしたら、
また、

それぞれのファイルは以下のような内容です。index.
<?xml version="1.0" encoding="utf-8" ?>
<configuration>
  <system.webServer>
    <fastCgi>
      <application fullPath="%RoleRoot%\approot\php\php-cgi.exe" />
    </fastCgi>
  </system.webServer>
</configuration><?xml version="1.0"?>
<configuration>
<system.diagnostics>
<trace>
<listeners>
<add type="Microsoft.WindowsAzure.Diagnostics.DiagnosticMonitorTraceListener,
Microsoft.WindowsAzure.Diagnostics, Version=1.0.0.0, Culture=neutral,
PublicKeyToken=31bf3856ad364e35" name="AzureDiagnostics">
<filter type="" />
</add>
</listeners>
</trace>
</system.diagnostics>
<system.webServer>
<!-- DO NOT REMOVE: PHP FastCGI Module Handler -->
<handlers>
<clear />
<add name="PHP via FastCGI"
path="*.php"
verb="*"
modules="FastCgiModule"
scriptProcessor="%RoleRoot%\approot\php\php-cgi.exe"
resourceType="Unspecified" />
<add name="StaticFile" path="*" verb="*" modules="StaticFileModule,DefaultDocumentModule,DirectoryListingModule" resourceType="Either" requireAccess="Read" />
</handlers>
<!-- Example WebRole IIS 7 Configation -->
<defaultDocument>
<files>
<clear />
<add value="index.php" />
</files>
</defaultDocument>
</system.webServer>
</configuration><html>
<body>
<p>LOCAL_ADDR: <?php echo $_SERVER["LOCAL_ADDR"]; ?></p>
</body>
</html>IISでPHPを動作させるための設定は以上です。
VHDをマウントするWebRole.csの作成
次に、
using System;
using System.Collections.Generic;
using System.Diagnostics;
using System.Linq;
using Microsoft.WindowsAzure;
using Microsoft.WindowsAzure.ServiceRuntime;
using Microsoft.WindowsAzure.StorageClient;

namespace WebRole1
{
    public class WebRole : RoleEntryPoint
    {
        private CloudDrive AzureDrive;

        public override bool OnStart()
        {
            // 構成設定の初期値を設定
            string connString = RoleEnvironment.GetConfigurationSettingValue("WindowsAzureStorageConnectionString");
            CloudStorageAccount storageAccount = CloudStorageAccount.Parse(connString);

            // Azureドライブのマウント
            CloudBlobClient blobClient = storageAccount.CreateCloudBlobClient();
            CloudBlobContainer blobContainer = blobClient.GetContainerReference("mysql");
            AzureDrive = storageAccount.CreateCloudDrive(blobContainer.GetPageBlobReference("disk.vhd").Uri.ToString());

            string driveLetter = AzureDrive.Mount(0, DriveMountOptions.Force);

            return base.OnStart();
        }

        public override void OnStop()
        {
            // Azureドライブのアンマウント
            AzureDrive.Unmount();

            base.OnStop();
        }
    }
}
ロールの初期化時にOnStart()、
Windows Azureドライブを利用するためには

MySQLを起動するスタートアップタスクを作成
次に、
@echo off
netsh advfirewall firewall add rule name="mysqld" dir=in action=allow program="f:\mysql\bin\mysqld.exe" enable=yes
schtasks /Create /SC MINUTE /MO 10 /TN MySQL /TR "f:\mysql\bin\mysqld.exe" /RU "NT AUTHORITY\NETWORKSERVICE" /F
ここでは、
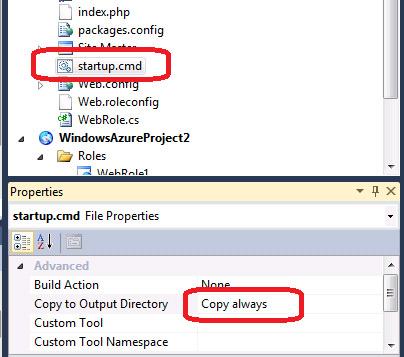
Azure上でstartup.
ServiceConfiguration.cscfgとServiceDefinition.csdefの編集
まず、
前回作成したストレージアカウント
<?xml version="1.0" encoding="utf-8"?>
<ServiceConfiguration serviceName="WindowsAzureProject1" xmlns="http://schemas.microsoft.com/ServiceHosting/2008/10/ServiceConfiguration" osFamily="1" osVersion="*">
  <Role name="WebRole1">
    <Instances count="1" />
    <ConfigurationSettings>
      <Setting name="Microsoft.WindowsAzure.Plugins.Diagnostics.ConnectionString" value="UseDevelopmentStorage=true" />
      <Setting name="WindowsAzureStorageConnectionString" value="DefaultEndpointsProtocol=http;AccountName=samplestorage001;AccountKey=******" />   <!--  ←この行を追加 -->
    </ConfigurationSettings>
  </Role>
</ServiceConfiguration>
ServiceDefinition.
<?xml version="1.0" encoding="utf-8"?>
<ServiceDefinition name="WindowsAzureProject2" xmlns="http://schemas.microsoft.com/ServiceHosting/2008/10/ServiceDefinition">
  <WebRole name="WebRole1" vmsize="ExtraSmall">
    <Startup>
      <Task commandLine="startup.cmd" taskType="background" executionContext="elevated"></Task> <!-- スタートアップタスクの登録 -->
    </Startup>
    <Endpoints>
      <InputEndpoint name="Endpoint1" protocol="http" port="80" />
    </Endpoints>
    <Imports>
      <Import moduleName="Diagnostics" />
    </Imports>
    <ConfigurationSettings>
      <Setting name="WindowsAzureStorageConnectionString" /> <!-- 定義の追加 -->
    </ConfigurationSettings>
  </WebRole>
</ServiceDefinition>my.iniの編集とdataのコピー
最後に、
my.
basedir="F:/mysql/"
datadir="F:/mysql/data/"
パッケージの作成とデプロイ後の確認
準備が整いましたので、

ビルドが終わると、
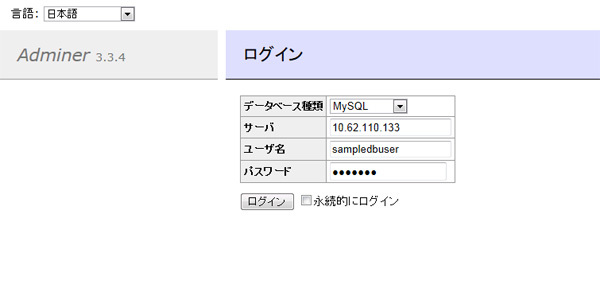
先ほどコピーしたIPアドレスと、
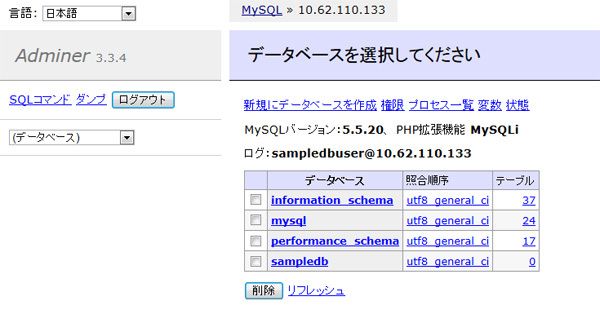
以上で、
なお、
次回からは、


