今回はRaspberry Pi 3のOSとしてRaspbianカーネルをインストールし、GNOME Flashbackを使用する方法を紹介します。
第450回との違い
第450回 では、ARM/RaspberryPi にあるインストールイメージを使用する方法を紹介しました。今回はUbuntu Pi Flavour Maker にあるインストールイメージを使用する方法を紹介します。
両者の大きな違いは、前者はUbuntuでメンテナンスしているカーネルを使用しているのに対し、後者はRaspbian のカーネルを使用しています。またRaspbianで提供されている便利ツールも使用できます。
Raspbianは言うまでもなくRaspberry Piシリーズに特化されたLinuxディストリビューションなので、Raspberry Piシリーズで使う分には便利ですが、それはそれで癖があるためコツを知っておかないといけません。一方Ubuntuでメンテナンスしているほうは新たに覚えることは全くなく、普通のUbuntuとして使用できます。
どちらがいいかは一長一短なので、前回と今回を読み比べてみた上で選択してください。
インストール ステージ1
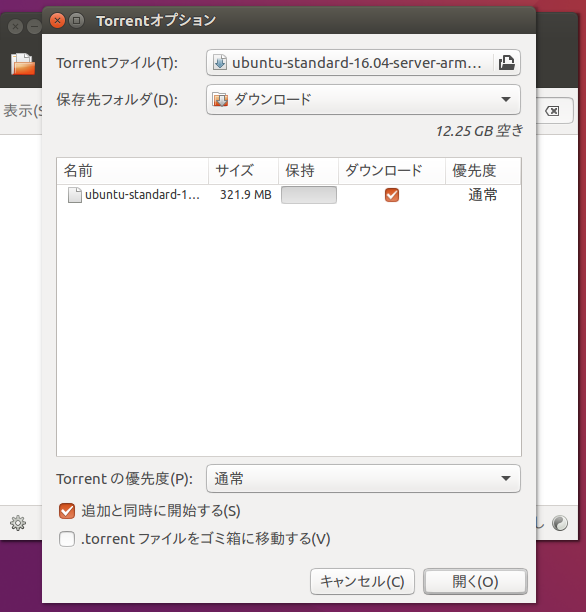
Ubuntu Pi Flavour MakerのDownloadページ から[Ubuntu Server Standard 16.04]をダウンロードします。Ubuntuロゴをクリックするとtorrentファイルをダウンロードできます。これをTransmissionで開くとダウンロードを開始します(図1 ) 。
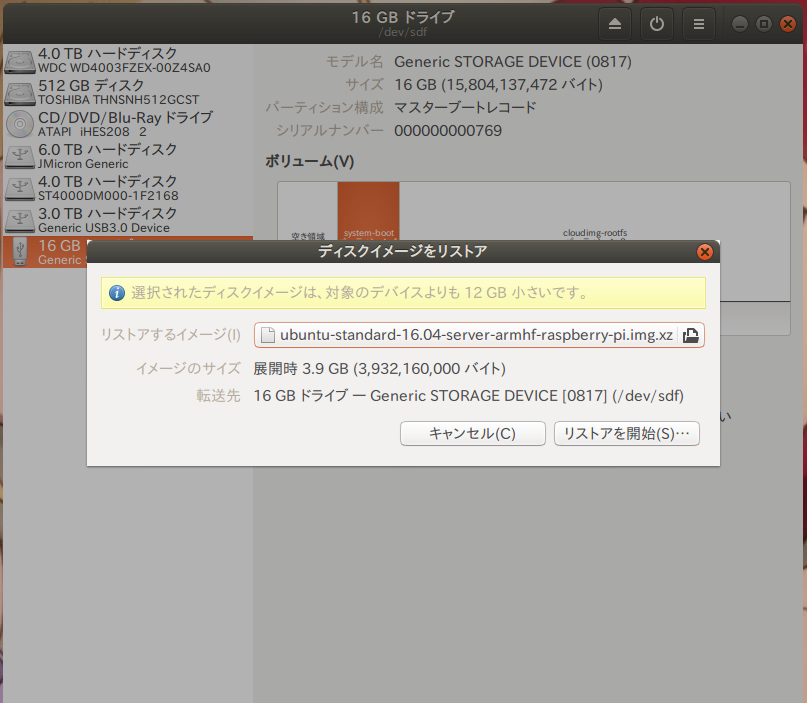
図1 Transmissionでtorrentファイルを読み込んだところダウンロードが完了したら母艦のUbuntuでmicroSDカードを認識させ、[ ディスク]を起動します。イメージを転送するmicroSDカードを選択し、右上のハンバーガーメニュー(「 三」のようなアイコン)をクリックし、[ ディスクイメージをリストア]を選択します。ダウンロードしたインストールイメージを選択し、[ リストアを開始]をクリック後、指示に従っていくと転送が始まります(図2 ) 。
図2 [ ディスク]でインストールイメージをリストアする 完了後、Raspberry Pi 3にmicroSDカードを接続し、電源ケーブルであるMicroUSBケーブルを接続してください。
インストール ステージ2
Raspberry Pi 3から起動するとコンソールログインになります。初期ユーザー名/パスワードは共に"ubuntu"です(引用符は不要) 。
まずは最初にapt updateを実行します。
$ sudo apt update 続いて最低限必要なパッケージをインストールします。avahi-daemonは必須として、vimユーザーはvimを、Emacsユーザーはemacsをインストールするといいでしょう。vimユーザーと仮定すると、コマンドでは次を実行します。
$ sudo apt install avahi-daemon vim byobu 以後はRaspberry Pi 3で実行してもいいですし、母艦であるUbuntuからsshでログインし実行してもいいですが、今回は後者と仮定します。
avahi-daemonパッケージがインストールされており、Ubuntu PCとRaspberry Pi 3の両方でAvahiデーモンが動作している場合は、次のコマンドでログインできます。
$ ssh ubuntu@ubuntu-standard.local ssh接続するメリットの一つが、コピー&ペーストが簡単に行えることですが、次で早速役に立ちます。
パッケージのダウンロード元がマスターサーバーになっているため、とても遅いです。というわけで、/etc/apt/sources.listを次のように書き換えてください。
deb http://jp.archive.ubuntu.com/ports/ xenial main restricted universe multiverse
deb-src http://jp.archive.ubuntu.com/ubuntu/ xenial main restricted universe multiverse

deb http://jp.archive.ubuntu.com/ports/ xenial-security main restricted universe multiverse
deb-src http://jp.archive.ubuntu.com/ubuntu/ xenial-security main restricted universe multiverse

deb http://jp.archive.ubuntu.com/ports/ xenial-updates restricted main multiverse universe
deb-src http://jp.archive.ubuntu.com/ubuntu/ xenial-updates restricted main multiverse universe

deb http://jp.archive.ubuntu.com/ports/ xenial-backports restricted main multiverse universe
deb-src http://jp.archive.ubuntu.com/ubuntu/ xenial-backports restricted main multiverse universe
書き換えが終わったら保存します。
リポジトリを更新し、パッケージをアップデートします。次のコマンドを実行してください。
$ sudo apt update
$ sudo apt upgrade 最初のコマンドでエラーが出た場合は、sources.listのコピー&ペーストにミスがあった可能性があるので、確認してください。
ここまでは第450回とほぼ同じですが(微妙に違いもあるので、そこは見落とさないでほしいのですが) 、ここからは大きく違ってきます。Raspbianにはraspi-configという便利なツールがあるため、これを使用します。とはいえインストールはされていないので、まずはインストールするところからです。次のコマンドを実行してください。
$ sudo apt install raspi-config 次のコマンドを実行し、rasipi-configを起動します。
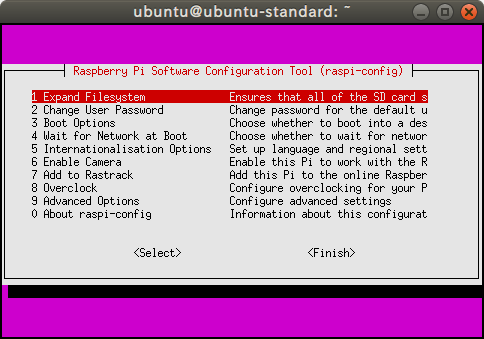
$ sudo raspi-config 図3 がraspi-configの起動直後の画面です。まずは[1 Expand Filesystem ]でエンターキーを押します。これだけでmicroSDの領域を限界まで使用します。すなわちmicroSDカードの容量が8GBだった場合、通常では4GBしか使用しませんが、これを実行すると8GBまで拡大します。
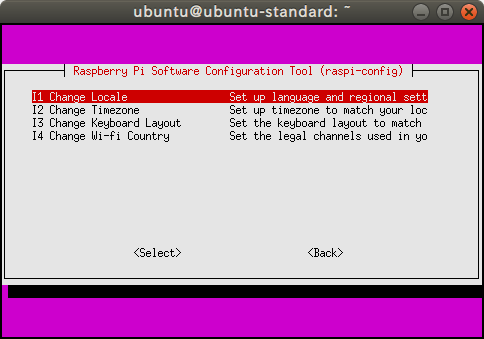
図3 raspi-configの起動直後[5 Internationalisation Options]に移動して、エンターキーを押します(図4 ) 。ここでは[I1 Change Locale]でエンターキーを押し(図5 ) 、[ ja_JP.UTF-8 UTF-8]に移動してスペースキーを押してチェックを付け、Tabキーで[<Ok>]に移動してエンターキーを押します。続いて[ja_JP.UTF-8]を選択して[<Ok>]でエンターキーを押し、設定を完了します。
図4 [ Internationalisation Options]を選択する 図5 [ Internationalisation Options]にはサブメニューがある 続いて[I2 Change Timezone]でエンターキーを押し、[ アジア]–[Tokyo]を選択して[<Ok>]をクリックします。
[I3 Change Keyboard Layout]でエンターキーを押し、[ 標準 105キー (国際) PC]–[日本語]–[日本語]–[キーボード配置のデフォルト]–[コンポーズキーなし]をそれぞれ選択し、[<Ok>]で終了します。
最後に[I4 Change Wi-fi County]でエンターキーを押し、[ JP Japan]を選択して[<Ok>]でエンターキーを押します。
ここまで設定したら最初の画面に戻ってきて[<Finish>]でエンターキーを押します。[ Would you like to reboot now?]で再起動します。
再起動後、いよいよ大量のパッケージをインストールします。次のコマンドを実行してください。
$ sudo apt install ubuntu-desktop gnome-session-flashback xserver-xorg-video-fbturbo dphys-swapfile インストールには時間がかかるので、しばしお待ちください。ちなみに筆者の環境では37分かかりました。優秀なmicroSDカードだったようです。
続いて設定変更を行います。まずは/etc/X11/xorg.confを以下のように変更してください。このファイルはデフォルトでは存在しないので、作成してください。
Section "Device"
    Identifier "Raspberry Pi FBDEV"
    Driver "fbturbo"
    Option "fbdev" "/dev/fb0"
    Option "SwapbuffersWait" "true"
EndSection
ネットワークの設定をNetwork Managerで管理する場合は、/etc/network/interfacesの最下行とその上を次のように変更し、コメントアウトしてください。
# interfaces(5) file used by ifup(8) and ifdown(8)
# Include files from /etc/network/interfaces.d:
source-directory /etc/network/interfaces.d

# The loopback network interface
auto lo
iface lo inet loopback

#auto eth0
#iface eth0 inet dhcp次のコマンドを実行して、カーネルを4.1から4.4にアップデートします(本記事掲載時点) 。
$ sudo rpi-update ここまで完了したら再起動してください。いよいよGUIでログインします。
ログイン
ログイン時にユーザー名(Ubuntu)の右にあるUbuntuロゴをクリックするとセッションが選択できるので、[ GNOME Flashback (Metacity)]を選択します。あとはパスワードを入力すればログインできます。
日本語関連パッケージのインストール
今回も日本語関連パッケージのインストールはGUIで行います。第450回と全く同じですが、一応紹介します。
[システム設定(System Settings)]–[言語サポート(Language Support)]を起動します。
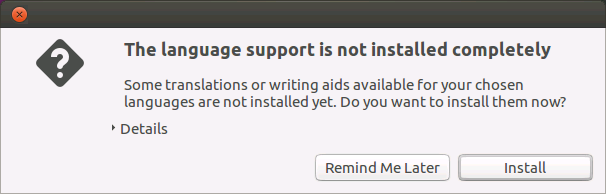
[The language support is not installed completely]というダイアログが表示されるので、[ Remind Me Later]をクリックします(図6 ) 。
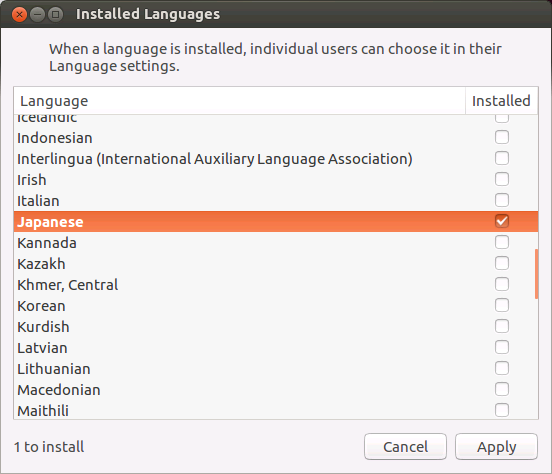
Language Supportが起動するので、[Install/Remove Languages]をクリックし(図7 ) 、[ Japanese]にチェックを入れて[Apply]をクリックしてしばらく待ちます(図8 ) 。インストールが完了したら再起動します。
Fcitxを使用する場合は、再起動後ログインして言語サポートを起動し、[ キーボード入力に使うIMシステム(Keyboard input method system)]を[fcitx]にし、ログアウト後再ログインします。
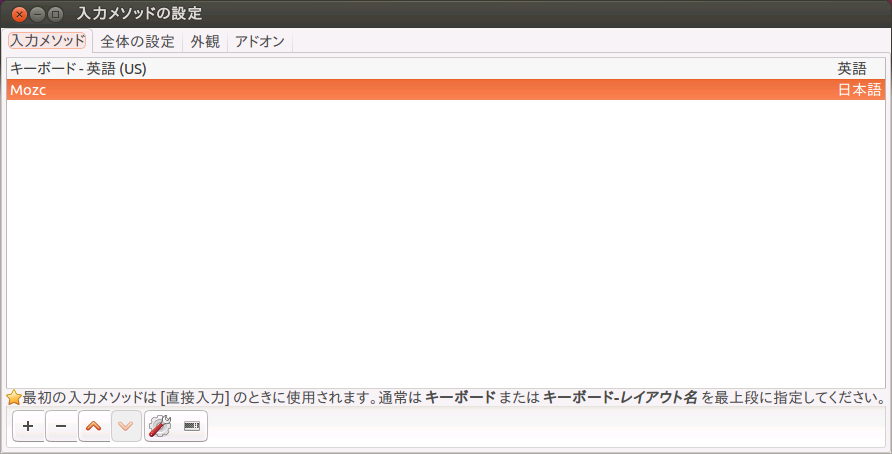
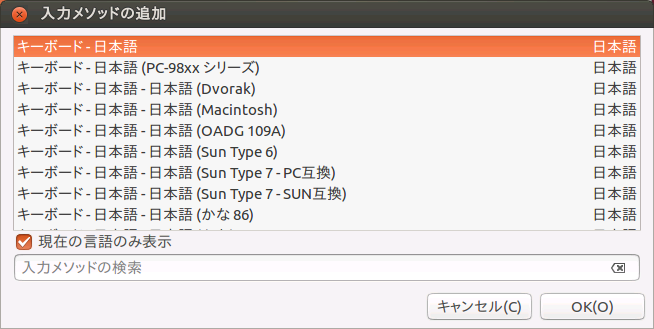
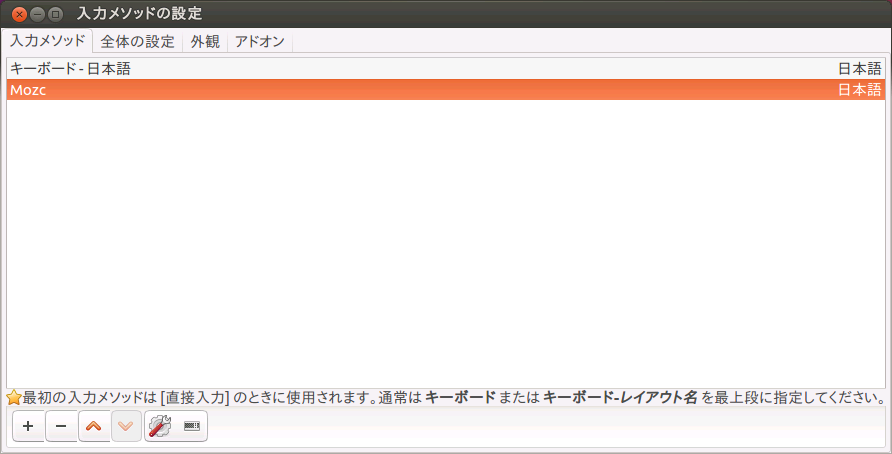
図6 英語で使用するために必要なパッケージをインストールする意味はないため、[ Remid Me Later]をクリック 図7 [ Install/Remove Languages]をクリック 図8 [ Japanese]にチェックを入れて[Apply]をクリック もし英語キーボードとして認識されている場合は、Fcitxの設定を起動し(図9 ) 、左下の[+]をクリックして[キーボード-日本語]を追加し(図10 ) 、一番上に移動します(図11 ) 。英語キーボードは不要な場合削除します。
図9 Fcitxの設定を起動し、[ +]をクリック 図10 日本語キーボードを選択図11 この状態になっていれば設定完了無線LAN
Raspberry Pi 3には無線LAN機能がありますが、2にはありません。また、3でも速度的には充分とはいえないので他のものを使用したいということはあるでしょう。しかし、このイメージのリポジトリにはカーネルヘッダーがないため、デフォルトで対応していないデバイスでは面倒です。
現在発売されているUSB 無線LANアダプターで、接続しただけで認識するものは多くありません。アイ・オー・データ機器のWN-G150UMシリーズ とWN-G300UA はその数少ないデバイスです。
前者はカーネル4.4から対応 しているので、Ubuntuカーネルでも認識するはずです。しかし、なぜかRaspberry Pi用のカーネルでは認識しません(genericカーネルであれば認識するのですが) 。後者はもっと古いバージョンのカーネルでも対応しています。
いずれも安価なデバイスですし、他にも使えるので、一つ持っておくといいかもしれません。