今回はクラススタイルでの制作の2回目です。前回は、
サイト制作
それでは、
1.子シーンの作成
まず、
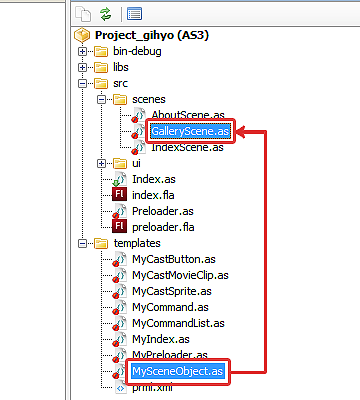
次にシーン同士を繋げる作業を行います。子シーンである
public class IndexScene extends SceneObject {
  public var galleryScene:GalleryScene;
  public function IndexScene() {
    title = "Project_gihyo";
    // インスタンスを生成します。
    galleryScene = new GalleryScene();
    // インスタンスの名前を設定します。
    galleryScene.name = "gallery";
    // 呼び出し元のIndexSceneに引数で設定したGallerySceneを追加します。
    addScene( galleryScene );
  }
これで
2.ボタンの作成
ボタンの作成も前回と同じです。プロジェクト[Project_
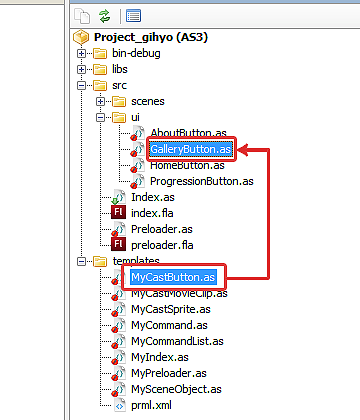
作成した
public function GalleryButton( initObject:Object = null ) {
  // 移動先となるシーン識別子を設定します。
  sceneId = new SceneId( "/index/gallery" );
}
作成したボタンを表示させましょう。
public class IndexScene extends SceneObject {
  public var galleryButton:GalleryButton;
  public function IndexScene() {
  	// インスタンスを生成します。
    galleryButton = new GalleryButton();
    // 座標を設定します。
    galleryButton.y = 254;
  }
  override protected function atSceneLoad():void {
  	// ボタンの表示を登録します。
    addCommand(
      new AddChild( container , galleryButton )
    );
  }
ボタンの表示も完了したので、
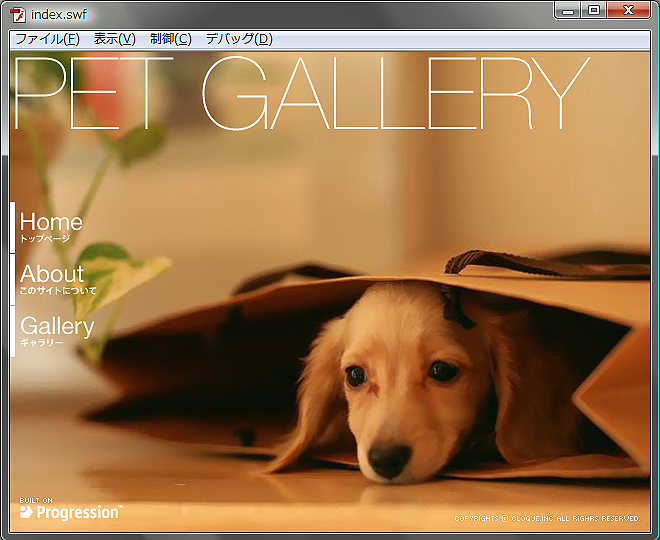
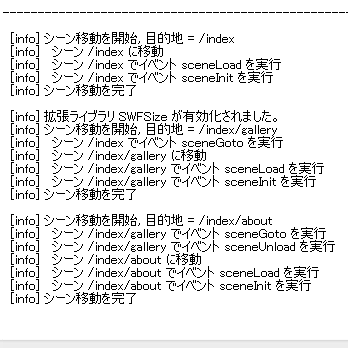
「GalleryButton」
3.表示オブジェクトの設定1
次に、
public class GalleryScene extends SceneObject {
  public var galleryPage:GalleryPage;
  public function GalleryScene( name:String = null, initObject:Object = null ) {
    super( name, initObject );
    title = "title";
    // インスタンスを生成します。
    galleryPage = new GalleryPage();
    // 座標を設定します。
    galleryPage.x = 151;
    galleryPage.y = 113;
  }
  override protected function atSceneLoad():void {
  	// インスタンスのアルファ値を設定します。
    galleryPage.alpha = 0;
    // addCommandに画像の表示とアニメーションの設定を登録します。
    addCommand(
      new AddChild( container , galleryPage ),
      new DoTweener( galleryPage , { alpha:1 , time:.2 } )
    );
  }
  override protected function atSceneUnload():void {
  	// addCommandに画像の削除とアニメーションの設定を登録します。
    addCommand(
      new DoTweener( galleryPage , { alpha:0 , time:.2 } ),
      new RemoveChild( container , galleryPage )
    );
  }
設定が完了したら、
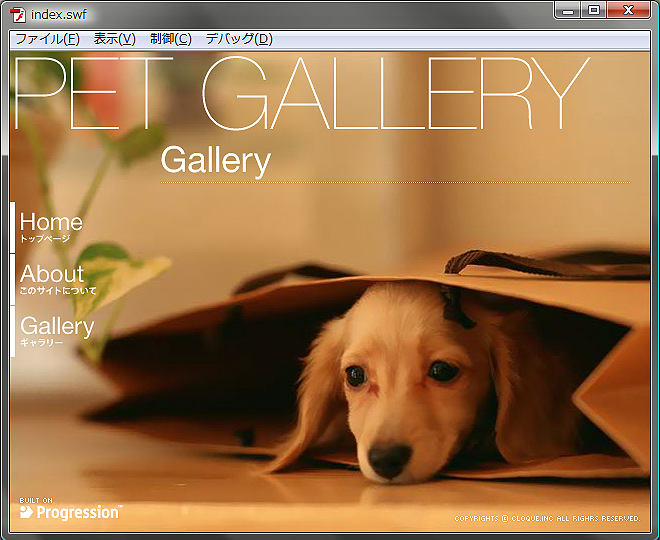
「GalleryButton」
4.子シーンの作成
続いて、
作成するシーンは3つです。全て同じ手順になります。[template]→[MySceneObject.
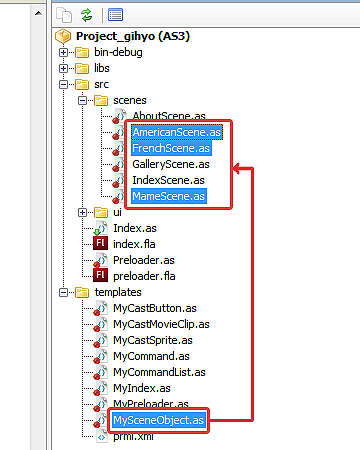
作成したシーンを、
public class GalleryScene extends SceneObject {
  public var american:AmericanScene;
  public var french:FrenchScene;
  public var mame:MameScene;
  public function GalleryScene( name:String = null, initObject:Object = null ) {
  	// それぞれインスタンスを生成し、名前を設定します。
    american = new AmericanScene();
    american.name = "american";
    // GallerySceneに子シーンを追加します。
    addScene( american );

    french = new FrenchScene();
    french.name = "french";
    addScene( french );

    mame = new MameScene();
    mame.name = "mame";
    addScene( mame );
  }
これで、
5.ボタンの作成
次に、
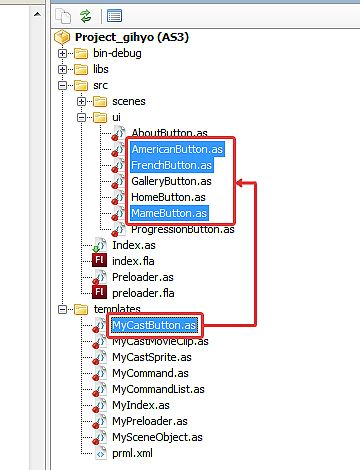
作成した
public function AmericanButton( initObject:Object = null ) {
  // 移動先となるシーン識別子を設定します。
  sceneId = new SceneId( "/index/gallery/american" );
} public function FrenchButton( initObject:Object = null ) {
// 移動先となるシーン識別子を設定します。
sceneId = new SceneId( "/index/gallery/french" );
} public function MameButton( initObject:Object = null ) {
// 移動先となるシーン識別子を設定します。
sceneId = new SceneId( "/index/gallery/mame" );
} 「sceneId」
public class GalleryScene extends SceneObject {
  public var americanButton:AmericanButton;
  public var frenchButton:FrenchButton;
  public var mameButton:MameButton;
  public function GalleryScene( name:String = null, initObject:Object = null ) {
  	// インスタンスを生成し、座標を設定します。
    americanButton = new AmericanButton();
    americanButton.x = 150;
    americanButton.y = 161;

    frenchButton = new FrenchButton();
    frenchButton.x = 270;
    frenchButton.y = 161;

    mameButton = new MameButton();
    mameButton.x = 390;
    mameButton.y = 161;
  }
  override protected function atSceneLoad():void {
  	// addCommandに画像の表示設定を登録します。
    addCommand(
      new AddChild( container , americanButton ),
      new AddChild( container , frenchButton ),
      new AddChild( container , mameButton )
    );
  }
  override protected function atSceneUnload():void {
    // addCommandに画像の削除設定を登録します。
    addCommand(
      new RemoveChild( container , americanButton ),
      new RemoveChild( container , frenchButton ),
      new RemoveChild( container , mameButton )
    );
  }
これでボタンの表示も完了したので、
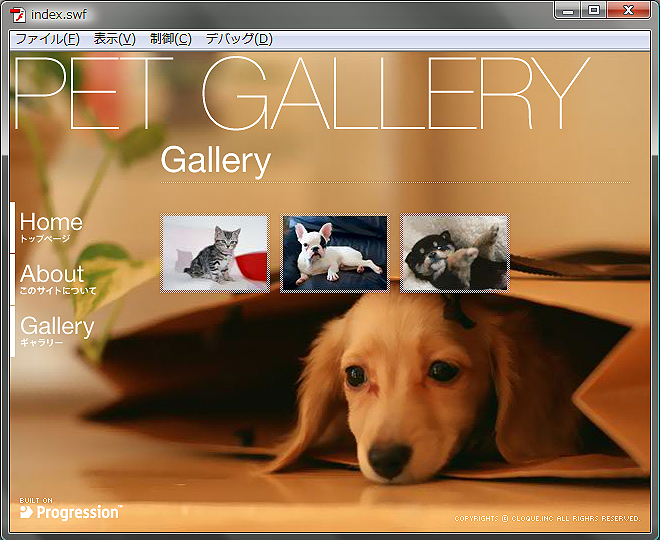


「AmericanButton」
6.表示オブジェクトの設定
次に、
シーンに表示させるオブジェクトの設定を行っていきます。以下のソースで宣言しているクラスは、
public class AmericanScene extends SceneObject {
  public var photoBG:PhotoBG;
  public var base:PhotoBase;
  public var closeButton:CloseButton;
  public var backButton:BackButton;
  public var nextButton:NextButton;
  public var americanPhoto:AmericanPhoto;
  public var americanText:AmericanText;
  public function AmericanScene() {
  	// インスタンスを生成し、座標を設定します。
    photoBG = new PhotoBG();

    base = new PhotoBase();
    base.x = 100;
    base.y = 20;

    closeButton = new CloseButton();
    closeButton.x = 507;
    closeButton.y = 30;

    backButton = new BackButton();
    backButton.x = 30;
    backButton.y = 220;

    nextButton = new NextButton();
    nextButton.x = 570;
    nextButton.y = 220;

    americanPhoto = new AmericanPhoto();
    americanPhoto.x = 120;
    americanPhoto.y = 40;

    americanText = new AmericanText();
    americanText.x = 119;
    americanText.y = 354;
  }
  override protected function atSceneLoad():void {
     // addCommandに画像の表示設定を登録します。
     addCommand(
      new AddChild( container , photoBG ),
      new AddChild( container , closeButton ),
      new AddChild( container , base ),
      new AddChild( container , backButton ),
      new AddChild( container , nextButton ),
      new AddChild( container , americanPhoto ),
      new AddChild( container , americanText )
    );
  }
}
ムービーを書き出して確認してみましょう。
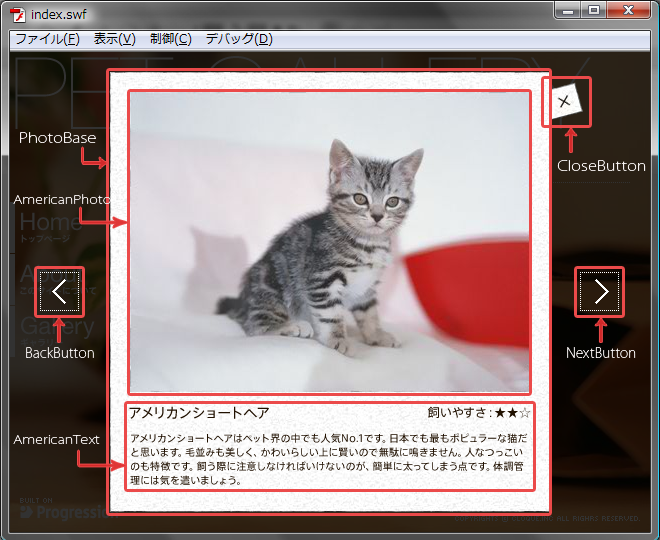
赤線で囲んでいる部分がそれぞれのシンボルに対応している部分です。シンボルと画像の詳細についてはFlaファイルを参照してください。
「GalleryScene」
まだ、
この手順で、
「GalleryScene」
public class GalleryScene extends SceneObject {
  public var photoBG:PhotoBG;
  public var base:PhotoBase;
  public var closeButton:CloseButton;
  public var backButton:BackButton;
  public var nextButton:NextButton;
  public function GalleryScene() {
  	// インスタンスを生成し、座標を設定します。
    photoBG = new PhotoBG();

    base = new PhotoBase();
    base.x = 100;
    base.y = 20;

    closeButton = new CloseButton();
    closeButton.x = 507;
    closeButton.y = 30;

    backButton = new BackButton();
    backButton.x = 30;
    backButton.y = 220;

    nextButton = new NextButton();
    nextButton.x = 570;
    nextButton.y = 220;
  }
これで、
もう一度
public class AmericanScene extends SceneObject {
  public var americanPhoto:AmericanPhoto;
  public var americanText:AmericanText;
  public function AmericanScene() {
  	// インスタンスを生成し、座標を設定します。
    americanPhoto = new AmericanPhoto();
    americanPhoto.x = 120;
    americanPhoto.y = 40;

    americanText = new AmericanText();
    americanText.x = 119;
    americanText.y = 354;
  }
  override protected function atSceneLoad():void {
    // parentプロパティを使用し、親シーンの持つプロパティにアクセスします。
    addCommand(
      new AddChild( container , GalleryScene(parent).photoBG ),
      new AddChild( container , GalleryScene(parent).closeButton ),
      new AddChild( container , GalleryScene(parent).base ),
      new AddChild( container , GalleryScene(parent).backButton ),
      new AddChild( container , GalleryScene(parent).nextButton ),
      // 自クラスのプロパティの表示を設定します。
      new AddChild( container , americanPhoto ),
      new AddChild( container , americanText )
    );
  }
}
ムービーを書き出して
シーンを移動する際は、
override protected function atSceneUnload():void {
  // 自クラスのプロパティのみ削除します。
  addCommand(
    new RemoveChild( container , americanPhoto ),
    new RemoveChild( container , americanText )
  );
}
「FrenchScene」
public class FrenchScene extends SceneObject {
  public var frenchPhoto:FrenchPhoto;
  public var frenchText:FrenchText;
  public function FrenchScene( name:String = null, initObject:Object = null ) {
	// インスタンスを生成し、座標を設定します。
    frenchPhoto = new FrenchPhoto();
    frenchPhoto.x = 120;
    frenchPhoto.y = 40;

    frenchText = new FrenchText();
    frenchText.x = 119;
    frenchText.y = 354;
  }
  override protected function atSceneLoad():void {
    // parentプロパティを使用し、親シーンの持つプロパティにアクセスします。
    addCommand(
      new AddChild( container , GalleryScene(parent).photoBG ),
      new AddChild( container , GalleryScene(parent).closeButton ),
      new AddChild( container , GalleryScene(parent).base ),
      new AddChild( container , GalleryScene(parent).backButton ),
      new AddChild( container , GalleryScene(parent).nextButton ),
      new AddChild( container , frenchPhoto ),
      new AddChild( container , frenchText )
    );
  }
  override protected function atSceneUnload():void {
  	// 自クラスのプロパティのみ削除します。
    addCommand(
      new RemoveChild( container , frenchPhoto ),
      new RemoveChild( container , frenchText )
    );
  }
} public class MameScene extends SceneObject {
public var mamePhoto:MamePhoto;
public var mameText:MameText;
public function MameScene( name:String = null, initObject:Object = null ) {
// インスタンスを生成し、座標を設定します。
mamePhoto = new MamePhoto();
mamePhoto.x = 120;
mamePhoto.y = 40;
mameText = new MameText();
mameText.x = 119;
mameText.y = 354;
}
override protected function atSceneLoad():void {
// parentプロパティを使用し、親シーンの持つプロパティにアクセスします。
addCommand(
new AddChild( container , GalleryScene(parent).photoBG ),
new AddChild( container , GalleryScene(parent).closeButton ),
new AddChild( container , GalleryScene(parent).base ),
new AddChild( container , GalleryScene(parent).backButton ),
new AddChild( container , GalleryScene(parent).nextButton ),
new AddChild( container , mamePhoto ),
new AddChild( container , mameText )
);
}
override protected function atSceneUnload():void {
// 自クラスのプロパティのみ削除します。
addCommand(
new RemoveChild( container , mamePhoto ),
new RemoveChild( container , mameText )
);
}
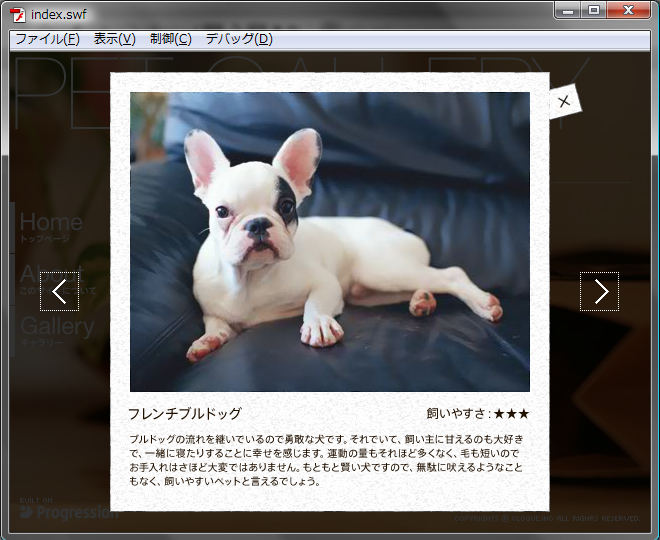
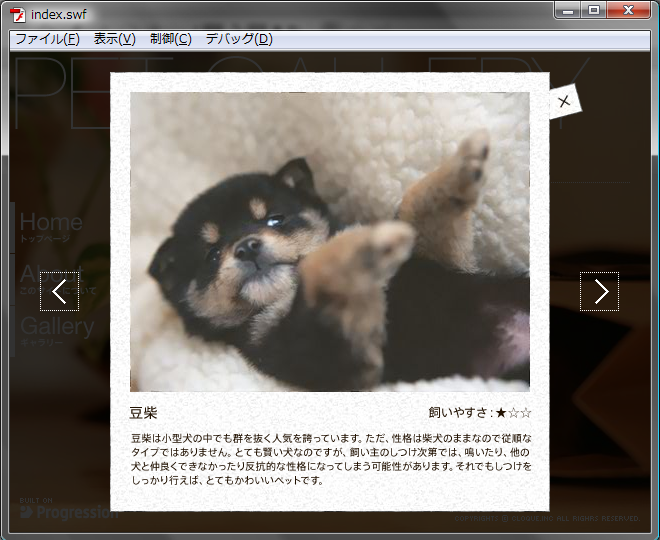
} ムービーを書き出して確認しましょう。それぞれのシーンに遷移すると、
「AmericanScene」
「GalleryScene」
override protected function atSceneInit():void {
  // addCommandに画像の削除設定を登録します。
  addCommand(
    new RemoveChild( container , photoBG ),
    new RemoveChild( container , base ),
    new RemoveChild( container , closeButton ),
    new RemoveChild( container , backButton ),
    new RemoveChild( container , nextButton )
  );
}
これで
7.ボタンの機能設定
次に、
プロジェクトの[template]→[MyCastButton.
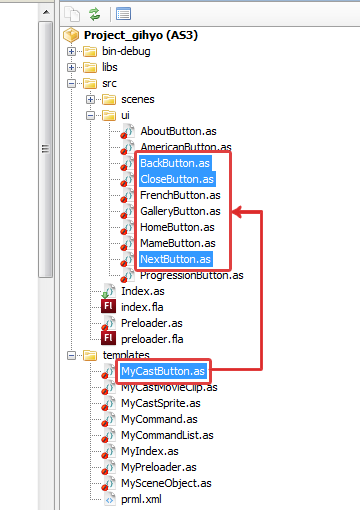
まずは
public function CloseButton( initObject:Object = null ) {
  // 移動先となるシーン識別子を設定します。
  sceneId = new SceneId( "/index/gallery" );
}
ここで、
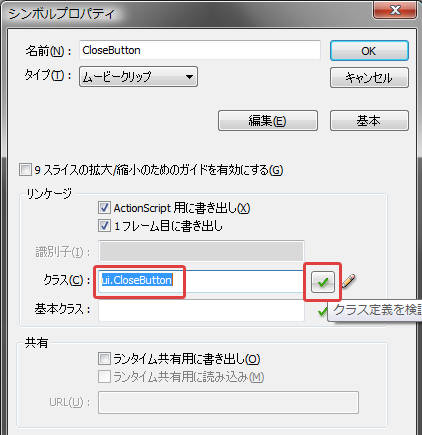
関連づけが完了したら、
次に
public function BackButton( initObject:Object = null ) {
  // 移動先となるシーン識別子を設定 します。
  // コメントアウト
  //sceneId = new SceneId( "/index" );
}
---------------------------------------------------
public function NextButton( initObject:Object = null ) {
  // 移動先となるシーン識別子を設定 します。
  // コメントアウト
  //sceneId = new SceneId( "/index" );
}
未設定の
「BackButton」
「AmericanScene」
override protected function atSceneLoad():void {
  // parentプロパティでアクセスし、移動先となるシーン識別子を設定します。
  GalleryScene(parent).backButton.sceneId = new SceneId( "/index/gallery/mame" );
  GalleryScene(parent).nextButton.sceneId = new SceneId( "/index/gallery/french" );
  addCommand(
      ※略
  );
}
同様に、
override protected function atSceneLoad():void {
  // parentプロパティでアクセスし、移動先となるシーン識別子を設定します。
  GalleryScene(parent).backButton.sceneId = new SceneId( "/index/gallery/american" );
  GalleryScene(parent).nextButton.sceneId = new SceneId( "/index/gallery/mame" );
} override protected function atSceneLoad():void {
// parentプロパティでアクセスし、移動先となるシーン識別子を設定します。
GalleryScene(parent).backButton.sceneId = new SceneId( "/index/gallery/french" );
GalleryScene(parent).nextButton.sceneId = new SceneId( "/index/gallery/american" );
} 「BackButton」
設定が完了したら、
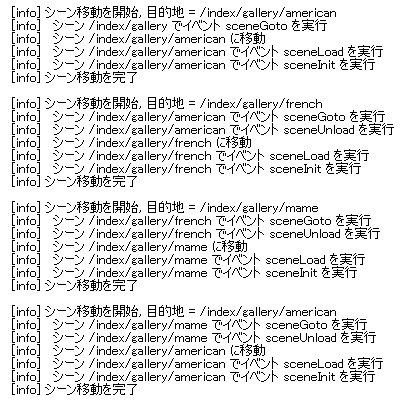
8.ロールオーバーの設定
トップページのボタンにロールオーバー時の効果を加えましょう。使用するのはFlaファイルの中にある
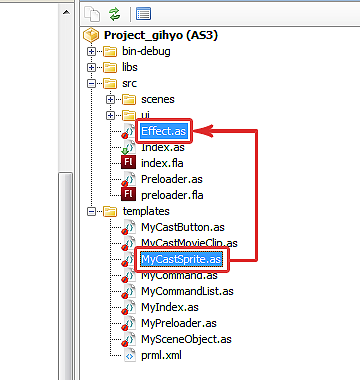
次に
public function Effect( initObject:Object = null ) {
  super( initObject );
}
override protected function atCastAdded():void {
  // 座標とアルファ値を設定します。
  x = -70;
  alpha = 0;
}
この設定により、
では、
「Effect」
override protected function atCastRollOver():void {
  // addCommandにEffectの表示設定を登録します。
  addCommand(
    new AddChild( this , effect ),
    new DoTweener( effect , { alpha:1 , x:0 , time:.2 , transition:"easeOutCirc" } )
  );
}
ロールアウト時の設定も行いましょう。コマンド
override protected function atCastRollOut():void {
  // addCommandにEffectの削除設定を登録します。
  addCommand(
    new DoTweener( effect , { alpha:0 , x:-70 , time:.2 , transition:"easeInCirc" } ),
    new RemoveChild( this , effect )
  );
}
上記の設定を、
ムービーを書き出して確認しましょう。
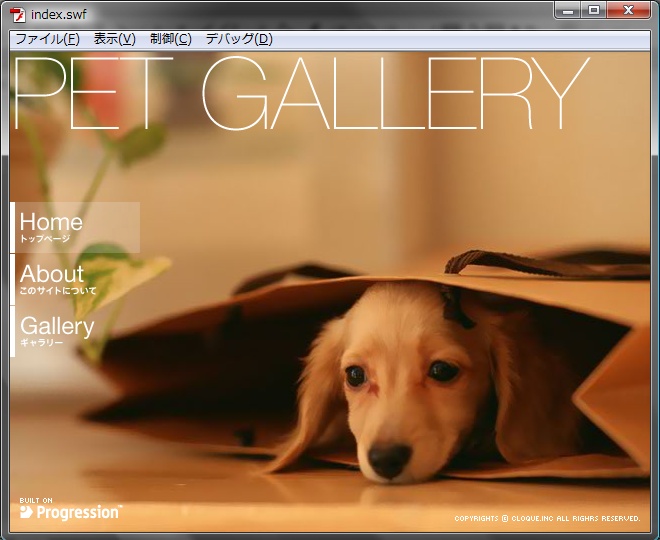
マウスのフォーカスをボタンにあてた際、
9.プリローダーの作成
最後に、
「Preloader」
public class Preloader extends CastPreloader {
  private var _loadedPerField:TextField;
  private var _progressBar:Shape;
続いて、
override protected function atReady():void {
  // インスタンスを作成し、座標、領域、自動拡大、初期値を設定します。
  _loadedPerField = new TextField();
  _loadedPerField.x = 220;
  _loadedPerField.y = -100;
  _loadedPerField.width = 210;
  _loadedPerField.autoSize = TextFieldAutoSize.CENTER;
  _loadedPerField.text = "Loading ... 0%";

  // インスタンスを作成し、領域、描画色を設定します。
  _progressBar = new Shape();
  var gr:Graphics = _progressBar.graphics;
  gr.beginFill(0x000000);
  gr.drawRect(0, 240, 640, 5);
  gr.endFill();
  _progressBar.scaleX = 0;
}
イベント
override protected function atCastLoadStart():void {
  addCommand(
    new AddChild( foreground , _loadedPerField ),
    new AddChild( foreground , _progressBar ),
    // テキストフィールドを画面内に移動させます。
    new DoTweener( _loadedPerField, { y:200, time:1 } )
  );
}
「foreground」
override protected function atProgress():void {
  var percent:Number = bytesLoaded / bytesTotal;
  // progressBar の横幅を、読み込み状態に応じて変化させます。
  _progressBar.scaleX = percent;
  // テキストフィールドの表示内容を、読み込み状態に応じて変化させます。
  _loadedPerField.text = "Loading ... " + Math.round( percent * 100 ) + "%";
}
最後に、
override protected function atCastLoadComplete():void {
  addCommand(
    // テキストフィールドを画面から消去します。
    new DoTweener( _loadedPerField, { alpha:0, time:1 } ),
    // progressBar を画面から消去します。
    new DoTweener( _progressBar , { alpha:0 , time:1 } ),
    // テキストフィールドを画面から削除します。
    new RemoveChild( foreground, _loadedPerField ),
    // progressBar を画面から削除します。
    new RemoveChild( foreground , _progressBar )
  );
}
以上の設定が完了したら、
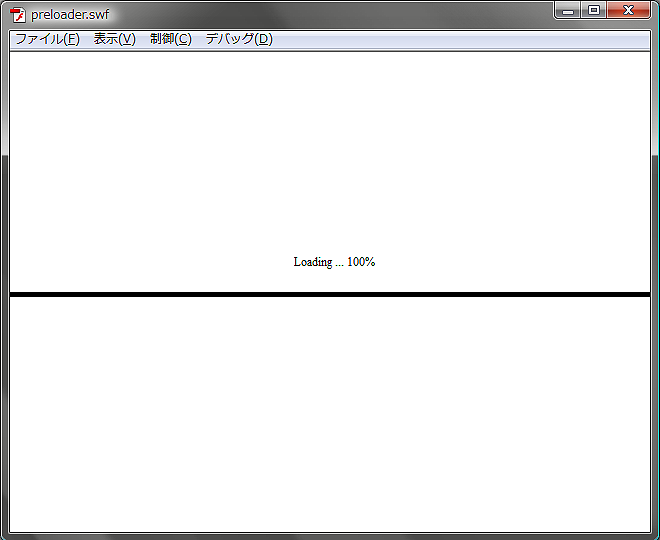
プリローダー画面で、
10.ブラウザでの確認
完成したサイトをブラウザで確認してみましょう。まず、
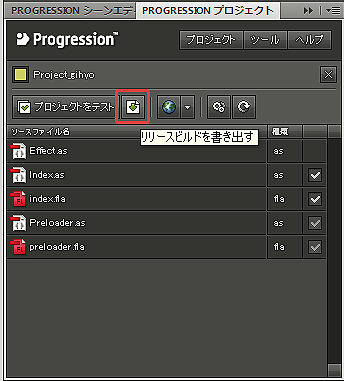
プロジェクト[Project_
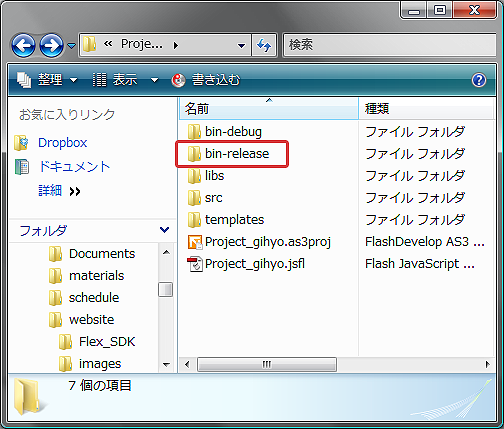
「bin-release」
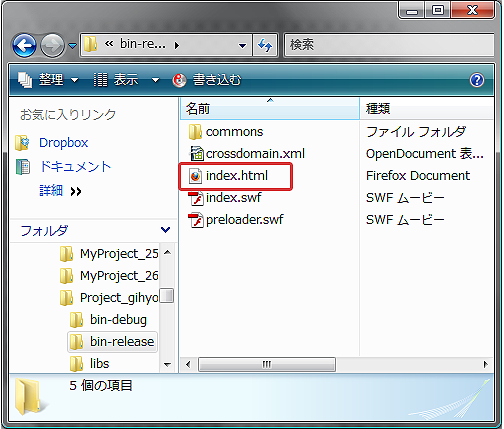
まとめ
以上で、
なお、
- ※追記
- 6月3日にリリースされたProgression ver 4.
0.12にあわせ、 データをアップデートしました。
次回は、


