はじめに
前回に引き続いて今回もBing Map App SDKの紹介です。前回はごく簡単なアプリケーションを作り、
- パネルの追加
- レイヤーのシリアライズ
今回作成するMap Appは、
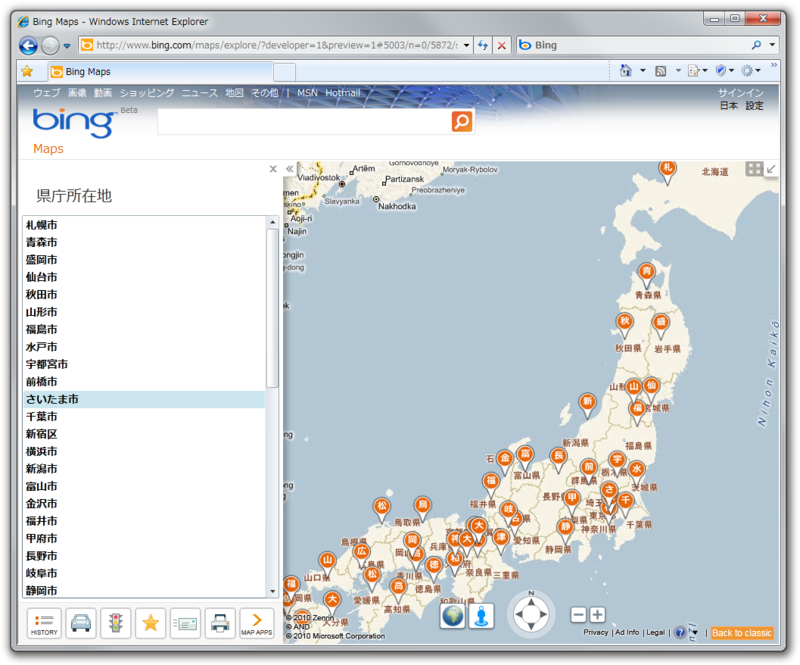
プラグイン クラスの作成
最初にMap Appのプロジェクトおよびプラグイン クラスを作りましょう。前回と同様ですので、
プロジェクトはC#のSilverlightクラス ライブラリ プロジェクトです。プロジェクト作成後、
続いて、
namespace CapitalCitiesBingMapApp
{
    using System;
    using Microsoft.Maps.Core;
    using Microsoft.Maps.Plugins;

    public class CapitalCitiesPlugin : Plugin
    {
        private Layer mainLayer;

        [ImportSingle("Microsoft/MapContract", ImportLoadPolicy.Synchronous)]
        public MapContract DefaultMap { get; set; }

        [ImportSingle("Microsoft/LayerManagerContract", ImportLoadPolicy.Synchronous)]
        public LayerManagerContract LayerManagerContract { get; set; }

        [ImportSingle("Microsoft/PushpinFactoryContract", ImportLoadPolicy.Synchronous)]
        public PushpinFactoryContract PushpinFactoryContract { get; set; }

        public override void Initialize()
        {
            // (後で編集)
        }

        public override void Activate(System.Collections.Generic.IDictionary<string, string> activationParameters)
        {
            if (LayerManagerContract.ContainsLayer(this.mainLayer))
            {
                LayerManagerContract.BringToFront(this.mainLayer);
            }
            else
            {
                LayerManagerContract.AddLayer(this.mainLayer);
            }
        }

    }
}
エンティティの作成
エンティティとはプッシュピンなどの地図上に表示するアイテムでした。前回のコードでは、
プロジェクトに新しいクラスを追加して、
namespace CapitalCitiesBingMapApp
{
    using Microsoft.Maps.Core;

    public class CityEntity : Entity
    {
        public string Name { get; set; }
    }
}
レイヤーの作成
続いてレイヤーを作成しましょう。レイヤーには県庁所在地を示すエンティティを追加します。また、
前回のコードではエンティティの追加を、
XMLファイルの追加
県庁所在地の名前と経緯度情報は、
プロジェクトに新しい項目としてXMLファイルを追加します
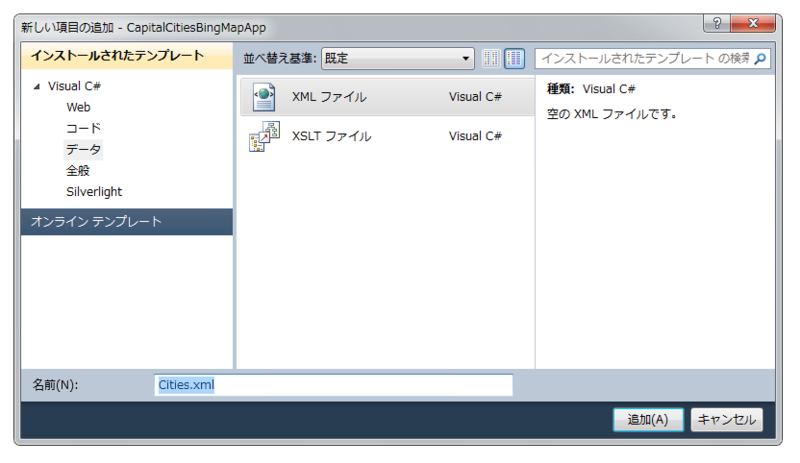
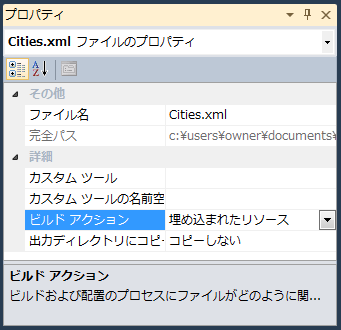
XMLファイルの内容は次のように、
<?xml version="1.0" encoding="utf-8" ?>
<Pushpins>
  <Pushpin Name="札幌市" Latitude="43.0646147" Longitude="141.3468074" />
  <Pushpin Name="青森市" Latitude="40.8243077" Longitude="140.7399984" />
  <Pushpin Name="盛岡市" Latitude="39.7036194" Longitude="141.1526839" />
(省略)
  <Pushpin Name="鹿児島市" Latitude="31.5610825" Longitude="130.5577279" />
  <Pushpin Name="那覇市" Latitude="26.2124013" Longitude="127.6809317" />
</Pushpins>
以上でXMLファイルの準備は完了です。内容からわかるように別に県庁所在地である必要はなく、
レイヤークラスの作成
次にLayerクラスを継承したレイヤー クラスを作成します。プロジェクトに新しいクラスを追加します。クラス名はCityLayer、
コンストラクタ内でXMLファイルを読み込み、
namespace CapitalCitiesBingMapApp
{
    using Microsoft.Maps.Core;
    using Microsoft.Maps.Plugins;
    using Microsoft.Maps.MapControl;
    using System.Collections.Generic;
    using System;
    using System.Windows;
    using System.IO;
    using System.Xml;

    public class CityLayer : Layer
    {
        private CapitalCitiesPlugin plugin;

        public CityLayer(PluginToken pluginToken, CapitalCitiesPlugin plugin) : base(pluginToken)
        {
            this.plugin = plugin;

            // リソースから XML ファイル読み込み
            var stream = System.Reflection.Assembly.GetExecutingAssembly().GetManifestResourceStream("CapitalCitiesBingMapApp.Cities.xml");
            using (var reader = XmlReader.Create(stream, new XmlReaderSettings()))
            {
                while (reader.Read())
                {
                    if (reader.NodeType == XmlNodeType.Element &&
                        reader.LocalName == "Pushpin")
                    {
                        // Entity の作成
                        var entity = new CityEntity();

                        // 県庁所在地名
                        reader.MoveToAttribute("Name");
                        entity.Name = reader.Value;

                        // 経緯度
                        var location = new Location();
                        reader.MoveToAttribute("Latitude");
                        location.Latitude = double.Parse(reader.Value);
                        reader.MoveToAttribute("Longitude");
                        location.Longitude = double.Parse(reader.Value);

                        // プッシュピンの追加
                        entity.Primitive = plugin.PushpinFactoryContract.CreateStandardPushpin(location, entity.Name[0].ToString());

                        // レイヤーに追加
                        this.Entities.Add(entity);
                    }
                }
            }
        }
    }
}
このレイヤーはプラグイン クラスから生成されることを想定しています。また、
このレイヤーを生成するコードをプラグインのInitializeメソッドに記述しておきましょう。
public override void Initialize()
{
    this.mainLayer = new CityLayer(this.Token, this);
}
パネルの作成
それでは、
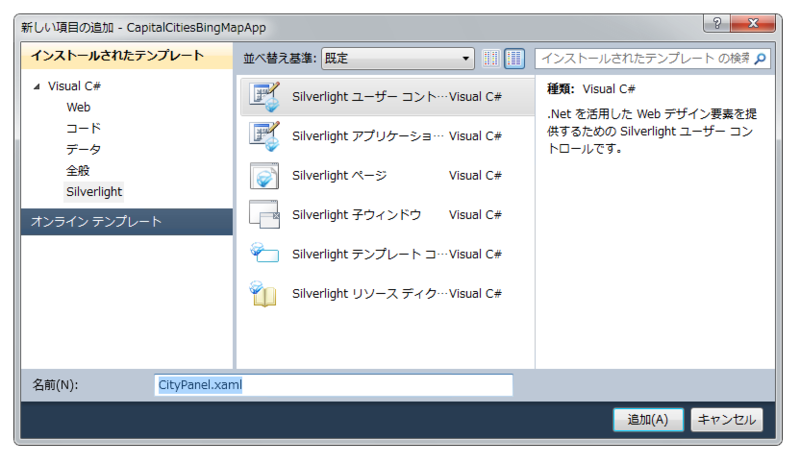
追加したUserControlのXAMLを編集して、
<ListBox Margin="5" ItemsSource="{Binding}" SelectionChanged="ListBox_SelectionChanged">
    <ListBox.ItemTemplate>
        <DataTemplate>
            <TextBlock
                Text="{Binding Name}"
                HorizontalAlignment="Stretch" VerticalAlignment="Stretch"
                FontWeight="Bold" FontSize="14" />
        </DataTemplate>
    </ListBox.ItemTemplate>
</ListBox>
XAML内の
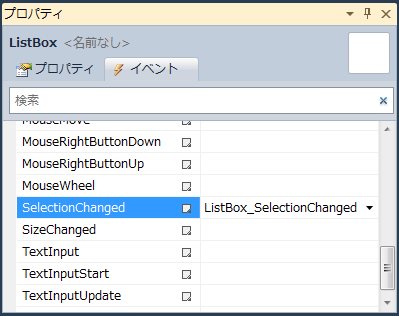
CityPanel.
namespace CapitalCitiesBingMapApp
{
    using System;
    using System.Windows;
    using System.Windows.Controls;

    public partial class CityPanel : UserControl
    {
        public CityPanel()
        {
            InitializeComponent();
        }

        public event EventHandler<RoutedEventArgs> ItemMouseClicked;

        private void ListBox_SelectionChanged(object sender, SelectionChangedEventArgs e)
        {
            CityEntity city = (CityEntity)((ListBox)sender).SelectedItem;
            if (this.ItemMouseClicked != null)
            {
                this.ItemMouseClicked(city, e);
            }
        }
    }
}
以上で、
レイヤーはひとつのパネルを持つことが可能です。ここで作成したパネルは、
var panel = new CityPanel() { DataContext = this.Entities };
panel.ItemMouseClicked += new EventHandler<RoutedEventArgs>(this.Panel_ItemMouseClicked);
this.Panel = panel;
this.Title = "県庁所在地";
CityPanelのDataContextプロパティにレイヤーのエンティティのコレクションを指定し、
上記コードのパネルの項目をクリックしたときの処理も記述しましょう。クラス内に次のメソッドを追記します。
private void Panel_ItemMouseClicked(object sender, RoutedEventArgs e)
{
    var entity = sender as CityEntity;
    if (entity != null)
    {
        this.plugin.DefaultMap.SetView(entity, this.plugin.DefaultMap.ZoomLevel);
    }
}
項目をクリックすると、
以上で、
レイヤーのシリアライズ
ここでレイヤーのシリアライズについて紹介しておきます。今回作成したMap Appを実行して、
ここでのシリアライズとは、
つまり、
レイヤーのシリアライズは、
[ExportSingle("Microsoft/LayerSerializationContract")]
public SerializationContract<Layer> LayerSerializationContract { get; private set; }
プラグインは機能を提供側ですので、
namespace CapitalCitiesBingMapApp
{
    using System;
    using System.Collections.Generic;
    using System.Windows;
    using Microsoft.Maps.Core;
    using Microsoft.Maps.MapControl;
    using Microsoft.Maps.Plugins;

    public class LayerSerializationContract : SerializationContract<Layer>
    {
        private Layer layer;

        public LayerSerializationContract(Layer layer)
        {
            this.layer = layer;
        }

        public override Dictionary<string, string> Serialize(Layer layer)
        {
            // レイヤー情報を string で表し キーと値のコレクションを返す
            var dictionary = new Dictionary<string, string>();
            return dictionary;
        }

        public override void Deserialize(Dictionary<string, string> serializedResult, Action<Layer> callbackAction)
        {
            // キーと値のコレクションからレイヤー情報を取得し
            // this.layer に対して適切な値などを設定した後
            // コールバックメソッドに渡す
            if (callbackAction != null)
            {
                callbackAction(this.layer);
            }
        }
    }
}
コードの内容はいたって簡単です。コンストラクタでは、
上記コードでは、
最後に、
public override void Initialize()
{
    this.mainLayer = new CityLayer(this.Token, this);
    this.LayerSerializationContract = new LayerSerializationContract(this.mainLayer);
}
以上でBing MapがこのMap Appのシリアライズ・
- Map Appを実行する
- 検索ボックスに地名を入力し、
その場所へ移動する - Webブラウザーの戻るボタンをクリックする
シリアライズ・
ちなみに、
いかがでしたでしょうか。今回も簡単なアプリケーションを作成してみました。まだまだMap Appとして作りこむ要素が残っています。次回もMap Appの作成について紹介します。


