Ruby連載の第4回目にあたる今回は、
本連載では、
“とりあえず動く”アプリを作ってみる
プロジェクトの作成
いきなりですが、
$ rails -d mysql addrbook
引数のうち、
プロジェクト名と同じaddrbookというディレクトリができますので、
$ ls -la
total 68
drwxrwsr-x 13 webmaster webmaster  4096 Jun 12 11:24 .
drwxr-sr-x  6 webmaster webmaster  4096 Jun 12 11:24 ..
drwxrwsr-x  6 webmaster webmaster  4096 Jun 12 11:24 app
drwxrwsr-x  5 webmaster webmaster  4096 Jun 12 11:24 config
drwxrwsr-x  2 webmaster webmaster  4096 Jun 12 11:24 db
drwxrwsr-x  2 webmaster webmaster  4096 Jun 12 11:24 doc
drwxrwsr-x  3 webmaster webmaster  4096 Jun 12 11:24 lib
drwxrwsr-x  2 webmaster webmaster  4096 Jun 12 11:24 log
drwxrwsr-x  5 webmaster webmaster  4096 Jun 12 11:24 public
-rw-rw-r--  1 webmaster webmaster   307 Jun 12 11:24 Rakefile
-rw-rw-r--  1 webmaster webmaster 10011 Jun 12 11:24 README
drwxrwsr-x  3 webmaster webmaster  4096 Jun 12 11:24 script
drwxrwsr-x  7 webmaster webmaster  4096 Jun 12 11:24 test
drwxrwsr-x  6 webmaster webmaster  4096 Jun 12 11:24 tmp
drwxrwsr-x  3 webmaster webmaster  4096 Jun 12 11:24 vendor
続いて、
$ script/generate scaffold item name:string phone:string mail:string
最後の3つの引数は、
次に、
(略)

development:
  adapter: mysql
  encoding: utf8
  reconnect: false
  database: addrbook_development
  pool: 5
  username: addruser
  password: addruser
  socket: /var/lib/mysql/mysql.sock

(以下略)
MySQLでの準備
ここでいったんRailsから離れて、
まずはMySQLにログインして、
$ mysql -u root -p
(略)
mysql> CREATE USER 'addruser'@'%' IDENTIFIED BY 'addruser';
続いて空のデータベースを作成し、
mysql> GRANT ALL PRIVILEGES ON `addrbook_development` . * TO 'addruser'@'%' WITH GRANT OPTION;
mysql> FLUSH PRIVILEGES;
mysql> exit
これで、
MySQLテーブルの作成
次は、
$ rake db:migrate
これだけでscript/
ブラウザでのアプリ実行
ここまでの手順で、
RailsはWEBrickという簡易型のhttpサーバを備えていて、
$ script/server
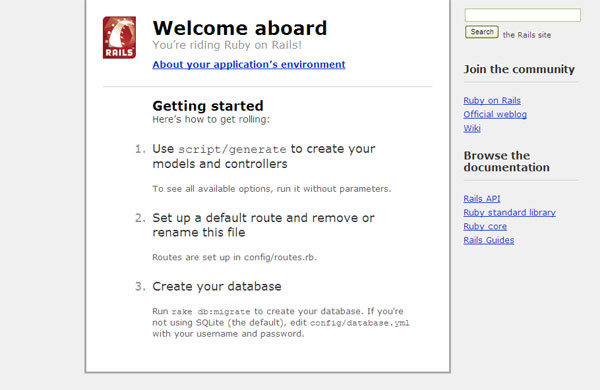
図2のように、
$ script/server

=> Booting WEBrick
=> Rails 2.3.2 application starting on http://0.0.0.0:3000
=> Call with -d to detach
=> Ctrl-C to shutdown server
[2009-06-12 12:14:41] INFO  WEBrick 1.3.1
[2009-06-12 12:14:41] INFO  ruby 1.9.1 (2009-05-12) [i686-linux]
[2009-06-12 12:14:41] WARN  TCPServer Error: Address already in use - bind(2)
[2009-06-12 12:14:41] INFO  WEBrick::HTTPServer#start: pid=20225 port=3000
なお、
ブラウザからアクセスするにはデフォルト設定の場合、
アクセスすると、

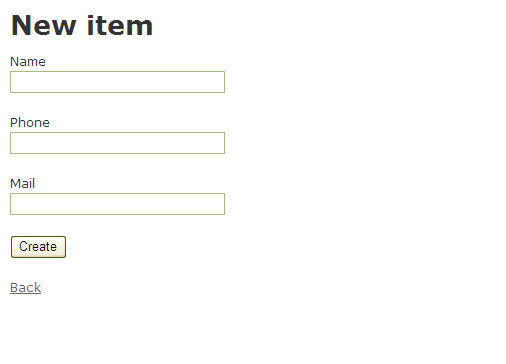
今回は説明の意味も含め、

下の方に

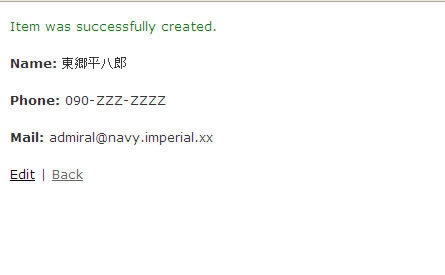
適当にデータを入れて、

今回のまとめ
このように、
なお、
画面周りも、
次回は、
Railsインストールに失敗したら
環境によってはRailsのインストール時にエラーメッセージが表示されたり、
- Rubyインストールの前に開発用パッケージ類をインストールする
たとえばCentOSの場合、
Rubyをインストールする前に下記のコマンドを実行しましょう。 $ yum install gcc bison zlib-devel mysql-devel openssl-devel
続いてRubyをインストールしますが、
既にソースからコンパイルしていた場合は、 ソースを展開したディレクトリを削除してから展開し直し、 再コンパイルします。 - MySQL/
Rubyのインストール MySQLを利用するために、
「MySQL/ Ruby」 のインストールが必要になる場合があります (MySQLとRubyではなく、 「MySQL/ Ruby」 という名称です)。 RailsからMySQLを利用する際にエラーになるようなら、
MySQL/ Rubyのソースをダウンロードして展開した後、 展開したディレクトリに移動してから以下の手順でインストールしましょう。なお、 MySQL/ RubyをRuby 1. 9.1で利用する場合には、 最新版のMySQL/ Ruby 2. 8.1を利用する必要があります (6月現在)。 ダウンロードするバージョンには注意してください。
$ ruby extconf.
rb --with-mysql-config $ make $ make install ※ CentOSの場合でmysql-develパッケージが未インストールの場合には、
あらかじめyumコマンドなどでインストールしておいてください。


