ZendFramework 1.
それでは1.
Zend Framework 1.8の新機能
Zend Framework 1.
- Zend_
Tool - プロジェクト、
コントローラ、 アクション等のスケルトンコードの自動生成 - Zend_
Application - アプリケーションのフレームワーク
- Zend_
Navigator - ナビゲーション
- Zend_
CodeGenerator - コード生成のフレームワーク
- Zend_
Serivce_ Amazon_ Ec2 - Amazon EC2サービス用のインターフェース
- Zend_
Service_ Amazon_ S3 - Amazon S3サービス用のインターフェース
このほかにも多数の機能が追加され、
この連載では1.
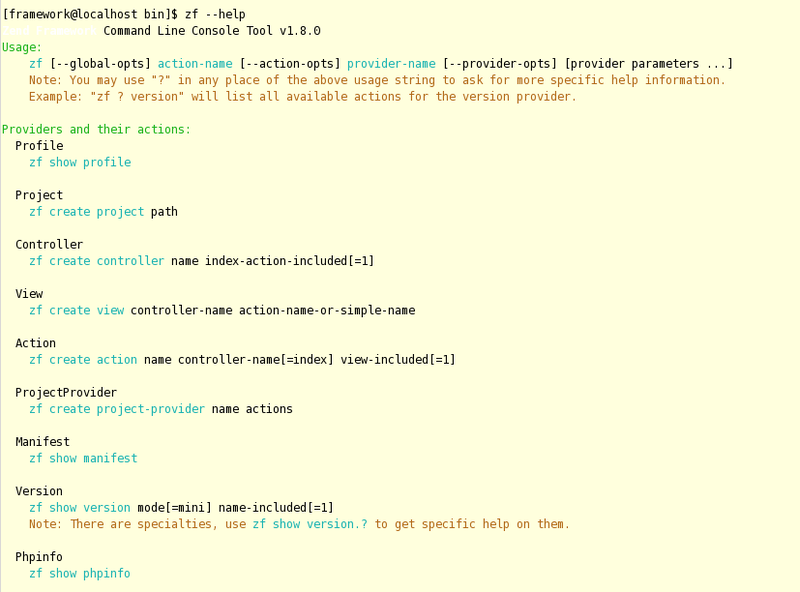
1.7と1.8のzfコマンドの違い
1.

最も重要な違いは、
Zend Framework 1.8のインストール
ZendFrameworkのダウンロードページから1.
執筆時点
今回から/wwwディレクトリにZendFrameworkを展開することにします。
[framework@localhost $ cd /www
[framework@localhost www]$ tar zxvf ZendFramework-1.8.0.tar.gz
新しいzfコマンドの使い方
新しいzfコマンドは従来通りシンボリックリンクでパスが通っている場所へリンクを作ってからも利用できますが、
[framework@localhost www]$ ZendFramework-1.8.0/bin/zf.sh --help
を実行するとヘルプが参照できます。
プロジェクトの作成
- zf create project path
でプロジェクトが作成できます。プロジェクトを作成してみましょう。
[framework@localhost www]$ ZendFramework-1.8.0/bin/zf.sh create project test
プロジェクトファイルの中身は
[framework@localhost www]$ ls -R test
test:
application  library  public  tests

test/application:
Bootstrap.php  configs  controllers  models  views

test/application/configs:
application.ini

test/application/controllers:
ErrorController.php  IndexController.php

test/application/models:

test/application/views:
helpers  scripts

test/application/views/helpers:

test/application/views/scripts:
error  index

test/application/views/scripts/error:
error.phtml

test/application/views/scripts/index:
index.phtml

test/library:

test/public:
index.php

test/tests:
application  library  phpunit.xml

test/tests/application:
bootstrap.php

test/tests/library:
bootstrap.php
となっており、
Zend Frameworkのファイルへのアクセス
ライブラリファイルがコピーされていないので、
[framework@localhost www]$ cd test/library/
[framework@localhost library]$ ls
[framework@localhost library]$ ln -s ../../ZendFramework-1.8.0/library/Zend
[framework@localhost library]$ ls
Zend
後はWebサーバがアクセスできるように/www/
[framework@localhost www]$ rm default
[framework@localhost www]$ ln -sf test default
これで新しく作成したZend Frameworkアプリケーションのスケルトンにアクセスできるようになります。
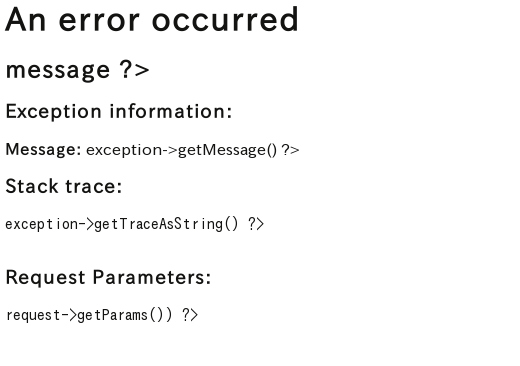
エラーページの問題
エラー処理のページも用意されていますが、
<?php<?php echoのショートカットである
<?<?=が利用されているため、
アプリケーション起動時に必ず読み込まれるbootstrap.
新しいページ(コントローラ、アクション、ビュー)の作成
- Controller
- zf create controller name index-action-included[=1]
- View
- zf create view controller-name action-name-or-simple-name
- Action
- zf create action name controller-name[=index] view-included[=1]
zfコマンドは上記の書式でコントローラ、
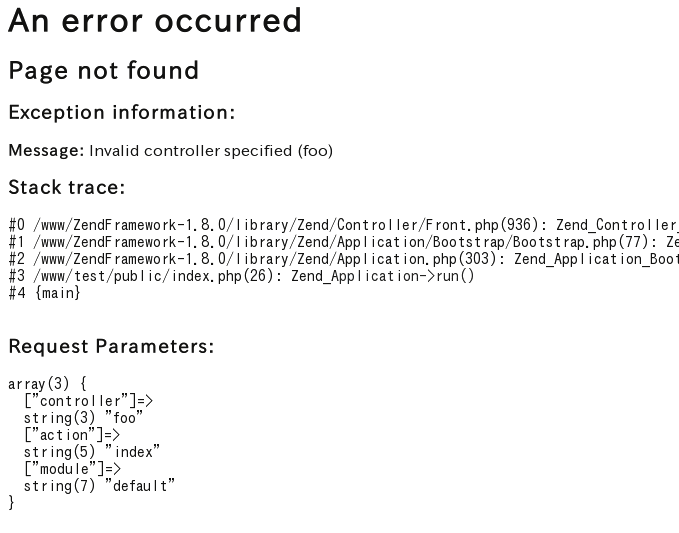
- http://
localhost/ foo/ bar/
としてアクセスできる、
[framework@localhost default]$ zf create controller  foo
Creating a controller at /www/test/application/controllers/FooController.php
Creating an index action method in controller foo
Creating a view script for the index action method at /www/test/application/views/scripts/foo/index.phtml
Creating a controller test file at /www/test/tests/application/controllers/FooControllerTest.php
Updating project profile '/www/test/.zfproject.xml'
indexコントローラも一緒に作成されたことが分かります。まずはindexコントローラにアクセスして動作を確かめてみましょう。

テキストだけのページですが、
今度はbarアクションを追加してみましょう。
[framework@localhost default]$ zf create action bar foo
Creating an action named bar inside controller at /www/test/application/controllers/FooController.php
Updating project profile '/www/test/.zfproject.xml'
Creating a view script for the bar action method at /www/test/application/views/scripts/foo/bar.phtml

必要なアクションがFooController.
FooController.
<?php

class FooController extends Zend_Controller_Action
{

    public function init()
    {
        /* Initialize action controller here */
    }

    public function indexAction()
    {
        // action body
    }

    public function barAction()
    {
        // action body
    }


}<br /><br /><center>View script for controller <b>foo</b> and script/action name <b>bar</b></center>この程度なら自分でコピーして作成してもよさそうですが、
zfコマンドで作成したプロジェクトの管理ファイル
コントローラとビューを作成する際に.zfproject.
<?xml version="1.0"?>
<projectProfile>
  <projectDirectory>
    <projectProfileFile/>
    <applicationDirectory>
      <apisDirectory enabled="false"/>
      <configsDirectory>
        <applicationConfigFile type="ini"/>
      </configsDirectory>
      <controllersDirectory>
        <controllerFile controllerName="index">
          <actionMethod actionName="index"/>
        </controllerFile>
        <controllerFile controllerName="error"/>
        <controllerFile controllerName="foo">
          <actionMethod actionName="index"/>
          <actionMethod actionName="bar"/>
        </controllerFile>
      </controllersDirectory>
      <layoutsDirectory enabled="false"/>
      <modelsDirectory/>
      <modulesDirectory enabled="false"/>
      <viewsDirectory>
        <viewScriptsDirectory>
          <viewControllerScriptsDirectory forControllerName="index">
            <viewScriptFile forActionName="index"/>
          </viewControllerScriptsDirectory>
          <viewControllerScriptsDirectory forControllerName="error">
            <viewScriptFile forActionName="error"/>
          </viewControllerScriptsDirectory>
          <viewControllerScriptsDirectory forControllerName="foo">
            <viewScriptFile forActionName="index"/>
          </viewControllerScriptsDirectory>
(以下省略)
このファイルを見ると、
今のところzfコマンドは単純なスケルトン作成コマンドでしかありませんが、
guestbookアプリの動作
Zend Framework 1.

index.php/bootstrap.phpの入れ替え
1.
<?php
// @see application/bootstrap.php
$bootstrap = true;
require '../application/bootstrap.php';

// $frontController is created in your boostrap file. Now we'll dispatch it, which dispatches your application.
$frontController->dispatch();<?php
// ** Check to see if the environment is already setup **
if (isset($bootstrap) && $bootstrap) {
// Enable all errors so we'll know when something goes wrong.
error_reporting(E_ALL | E_STRICT);
ini_set('display_startup_errors', 1);
ini_set('display_errors', 1);
// Add our directory to the include path so that PHP can find the Zend Framework classes.
// you may wish to add other paths here, or keep system paths: set_include_path('../library' . PATH_SEPARATOR . get_include_path()
set_include_path('../library');
// Set up autoload.
// This is a nifty trick that allows ZF to load classes automatically so that you don't have to litter your
// code with 'include' or 'require' statements.
require_once "Zend/Loader.php";
Zend_Loader::registerAutoload();
}
// ** Get the front controller **
// The Zend_Front_Controller class implements the Singleton pattern, which is a design pattern used to ensure
// there is only one instance of Zend_Front_Controller created on each request.
$frontController = Zend_Controller_Front::getInstance();
// Point the front controller to your action controller directory.
$frontController->setControllerDirectory('../application/controllers');
// Set the current environment
// Set a variable in the front controller indicating the current environment --
// commonly one of development, staging, testing, production, but wholly
// dependent on your organization and site's needs.
$frontController->setParam('env', 'development');1.
<?php

// Define path to application directory
defined('APPLICATION_PATH')
    || define('APPLICATION_PATH', realpath(dirname(__FILE__) . '/../application'));

// Define application environment
defined('APPLICATION_ENV')
    || define('APPLICATION_ENV', (getenv('APPLICATION_ENV') ? getenv('APPLICATION_ENV') : 'production'));

// Ensure library/ is on include_path
set_include_path(implode(PATH_SEPARATOR, array(
    realpath(APPLICATION_PATH . '/../library'),
    get_include_path(),
)));

/** Zend_Application */
require_once 'Zend/Application.php';

// Create application, bootstrap, and run
$application = new Zend_Application(
    APPLICATION_ENV,
    APPLICATION_PATH . '/configs/application.ini'
);
$application->bootstrap()
->run();<?php
class Bootstrap extends Zend_Application_Bootstrap_Bootstrap
{
}Zend Framework 1.
動作環境の設定
1.
Apacheの場合、 を追加してWebサーバを再起動します これでエラーページに詳細なエラー情報は表示されるべきなのですが、SetEnv APPLICATION_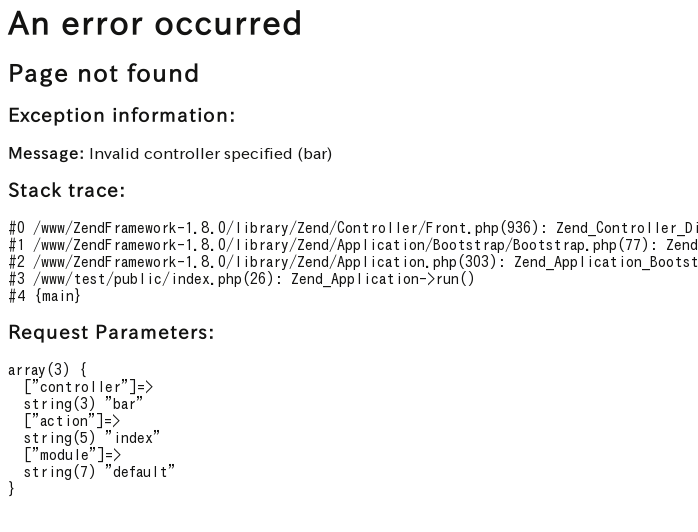
まとめ
目立った機能追加などはありませんが、
今後は新しいzfコマンドを使ってアプリケーションを構築していきます。


