


今回はRcloneと専用GNOME Shell拡張機能であるrclone-managerを併用し、さまざまなクラウドストレージサービスをまるで専用クライアントを使用しているかのようにアクセスする方法を紹介します。
Ubuntuとさまざまなクラウドストレージサービス
世の中にはさまざまなクラウドストレージサービス
中にはDropboxのようにUbuntuのリポジトリからパッケージ
そんな時に使用したいのがRcloneです。Rcloneはさまざまなサービスを簡単に使用できるようにするコマンドラインのプログラムです。Rcloneのトップページを見ると、たくさんのサービスに対応していることがわかります。また設定方法も可能な限り統一化するように設計されており、とても使いやすくなっています。
とはいえRcloneはコマンドラインのプログラムであり、できることならGUIで扱いたいものです。いくつかのGUIフロントエンドが
というわけで、今回はRcloneとrclone-managerを紹介します。
今回検証に使用したのはUbuntu 22.
Rcloneとrclone-managerのインストール
RcloneはUbuntuのリポジトリにもパッケージがありますが、アップデートが頻繁にリリースされているため、それに追随しないのは望ましくないどころか使えなくなる恐れもあります。となるとオフィシャルバイナリになりますが、基本的にはインストールスクリプトを実行してインストールすることになります。オフィシャルにAPTリポジトリは用意されておらず、もし使用するなら非公式なリポジトリを追加することになります。
RcloneはGoで書かれており、パッケージであってもバイナリ1つとmanページくらいなものなので、特にパッケージにこだわる必要はないでしょう。また後述しますがアップデートするコマンドもありますし、アンインストールもバイナリとmanページを消すだけなので、今回はインストールスクリプトを実行する方法を紹介します。
というわけで次のコマンドを実行してインストールしてください。
$ sudo apt install curl
$ curl https://rclone.org/install.sh | sudo bash
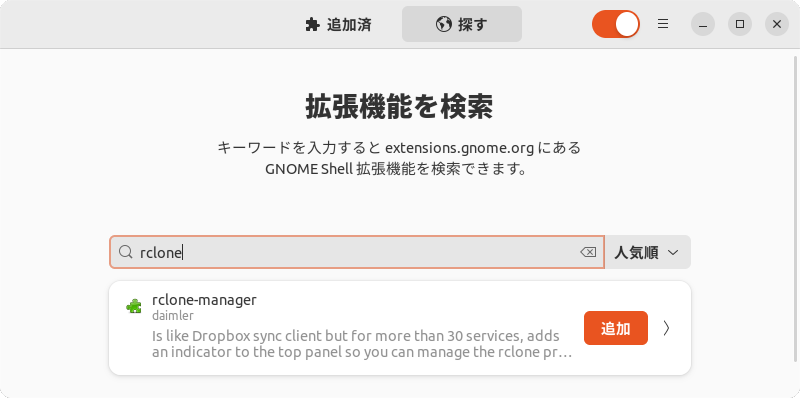
続けてrclone-managerですが、第712回で紹介したExtension Managerを使用し、インストールします。
Extension Managerをインストールしていない場合はUbuntuソフトウェアからインストールしてください。Extension Managerを起動して
rclone-managerでの設定
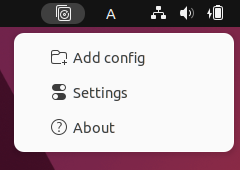
rclone-managerをインストールすると右上にアイコンが表示されるので、ここをクリックします
Dropbox
まずはDropboxを設定します。
n) New remote
s) Set configuration password
q) Quit config
n/s/q> n

Enter name for new remote.
name> Dropbox
「New remote」
Option Storage.
Type of storage to configure.
Choose a number from below, or type in your own value.
(略)
13 / Dropbox
   \ (dropbox)
(略)
Storage> 13
Dropboxは13なので、
Option client_id.
OAuth Client Id.
Leave blank normally.
Enter a value. Press Enter to leave empty.
client_id>

Option client_secret.
OAuth Client Secret.
Leave blank normally.
Enter a value. Press Enter to leave empty.
client_secret>

Edit advanced config?
y) Yes
n) No (default)
y/n>

Use auto config?
 * Say Y if not sure
 * Say N if you are working on a remote or headless machine

y) Yes (default)
n) No
y/n>
DropboxはOAuthで認証するので、ここでは特に変更せずエンターキーを押します。
2022/07/23 14:36:27 NOTICE: If your browser doesn't open automatically go to the following link: http://127.0.0.1:53682/auth?state=(略)
2022/07/23 14:36:27 NOTICE: Log in and authorize rclone for access
2022/07/23 14:36:27 NOTICE: Waiting for code...
2022/07/23 14:37:27 NOTICE: Got code
Configuration complete.
Options:
- type: dropbox
- token: {"access_token":"(略)"}
Keep this "Dropbox" remote?
y) Yes this is OK (default)
e) Edit this remote
d) Delete this remote
y/e/d>

Current remotes:

Name                 Type
====                 ====
Dropbox              dropbox

e) Edit existing remote
n) New remote
d) Delete remote
r) Rename remote
c) Copy remote
s) Set configuration password
q) Quit config
e/n/d/r/c/s/q>
OAuth認証に成功するとアクセストークンを取得するので、それを保存して終了です。とはいえエンターキーを押すだけです。
非常に簡単です。
OneDrive
続けてOneDriveを設定します。OneDriveもOAuth認証なので途中でWebブラウザーが開きます。
e) Edit existing remote
n) New remote
d) Delete remote
r) Rename remote
c) Copy remote
s) Set configuration password
q) Quit config
e/n/d/r/c/s/q> n

Enter name for new remote.
name> OneDrive

Option Storage.
Type of storage to configure.
Choose a number from below, or type in your own value.
(略)
32 / Microsoft OneDrive
   \ (onedrive)
(略)
Storage> 32

Option client_id.
OAuth Client Id.
Leave blank normally.
Enter a value. Press Enter to leave empty.
client_id>

Option client_secret.
OAuth Client Secret.
Leave blank normally.
Enter a value. Press Enter to leave empty.
client_secret>

Option region.
Choose national cloud region for OneDrive.
Choose a number from below, or type in your own string value.
Press Enter for the default (global).
 1 / Microsoft Cloud Global
   \ (global)
 2 / Microsoft Cloud for US Government
   \ (us)
 3 / Microsoft Cloud Germany
   \ (de)
 4 / Azure and Office 365 operated by 21Vianet in China
   \ (cn)
region>

Edit advanced config?
y) Yes
n) No (default)
y/n>

Use auto config?
 * Say Y if not sure
 * Say N if you are working on a remote or headless machine

y) Yes (default)
n) No
y/n>

2022/07/23 14:41:33 NOTICE: If your browser doesn't open automatically go to the following link: http://127.0.0.1:53682/auth?state=(略)
2022/07/23 14:41:33 NOTICE: Log in and authorize rclone for access
2022/07/23 14:41:33 NOTICE: Waiting for code...
2022/07/23 14:42:42 NOTICE: Got code
Option config_type.
Type of connection
Choose a number from below, or type in an existing string value.
Press Enter for the default (onedrive).
 1 / OneDrive Personal or Business
   \ (onedrive)
 2 / Root Sharepoint site
   \ (sharepoint)
   / Sharepoint site name or URL
 3 | E.g. mysite or https://contoso.sharepoint.com/sites/mysite
   \ (url)
 4 / Search for a Sharepoint site
   \ (search)
 5 / Type in driveID (advanced)
   \ (driveid)
 6 / Type in SiteID (advanced)
   \ (siteid)
   / Sharepoint server-relative path (advanced)
 7 | E.g. /teams/hr
   \ (path)
config_type> 1
OneDriveにはさまざま形式があるのですが、今回はMicrosoftアカウントのOneDriveなので1を入力しました。Microsoft 365アカウントも1でいいので、多くの場合は1を選択することになるでしょう。
Option config_driveid.
Select drive you want to use
Choose a number from below, or type in your own string value.
Press Enter for the default (11656c44739dce1b).
 1 /  (personal)
   \ (11656c44739dce1b)
config_driveid>

Drive OK?

Found drive "root" of type "personal"
URL: https://onedrive.live.com/?cid=11656c44739dce1b

y) Yes (default)
n) No
y/n>

Configuration complete.
Options:
- type: onedrive
- token: {"access_token":"(略)","expiry":"2022-07-23T15:42:44.171574511+09:00"}
- drive_id: 11656c44739dce1b
- drive_type: personal
Keep this "OneDrive" remote?
y) Yes this is OK (default)
e) Edit this remote
d) Delete this remote
y/e/d>

Current remotes:

Name                 Type
====                 ====
Dropbox              dropbox
OneDrive             onedrive

e) Edit existing remote
n) New remote
d) Delete remote
r) Rename remote
c) Copy remote
s) Set configuration password
q) Quit config
e/n/d/r/c/s/q>
このようにOneDrive特有の設定もあるものの、Dropboxと概ね同じ手順であることがわかります。
WebDAV
最後にWebDAVの設定を追加します。Nextcloudもこちらになるのですが、オンラインアカウント機能を使えばいいということで今回はTeraCLOUDを使用することにします。アカウントを作成すると無料で10GBの容量があり、DropboxやOneDriveよりも多いです。
TeraCLOUDでは事前に
では設定していきます。
e) Edit existing remote
n) New remote
d) Delete remote
r) Rename remote
c) Copy remote
s) Set configuration password
q) Quit config
e/n/d/r/c/s/q> n

Enter name for new remote.
name> TeraCLOUD

Option Storage.
Type of storage to configure.
Choose a number from below, or type in your own value.
(略)
45 / WebDAV
   \ (webdav)
(略)
Storage> 45

Option url.
URL of http host to connect to.
E.g. https://example.com.
Enter a value.
url> (WebDAV接続URL)
URLにはWebDAV接続URLを入力してください。
Option vendor.
Name of the WebDAV site/service/software you are using.
Choose a number from below, or type in your own value.
Press Enter to leave empty.
 1 / Nextcloud
   \ (nextcloud)
 2 / Owncloud
   \ (owncloud)
 3 / Sharepoint Online, authenticated by Microsoft account
   \ (sharepoint)
 4 / Sharepoint with NTLM authentication, usually self-hosted or on-premises
   \ (sharepoint-ntlm)
 5 / Other site/service or software
   \ (other)
vendor> 5
Nextcloudの場合はここで1を入力しますが、TeraCLOUDはここにないので5を入力します。
Option user.
User name.
In case NTLM authentication is used, the username should be in the format 'Domain\User'.
Enter a value. Press Enter to leave empty.
user> (接続ID)

Option pass.
Password.
Choose an alternative below. Press Enter for the default (n).
y) Yes, type in my own password
g) Generate random password
n) No, leave this optional password blank (default)
y/g/n> y
Enter the password:
password:
Confirm the password:
password:
接続IDとアプリパスワードを入力します。
Option bearer_token.
Bearer token instead of user/pass (e.g. a Macaroon).
Enter a value. Press Enter to leave empty.
bearer_token>

Edit advanced config?
y) Yes
n) No (default)
y/n>

Configuration complete.
Options:
- type: webdav
- url: (WebDAV接続URL)
- vendor: other
- user: (接続ID)
- pass: *** ENCRYPTED ***
Keep this "TeraCLOUD" remote?
y) Yes this is OK (default)
e) Edit this remote
d) Delete this remote
y/e/d>

Current remotes:

Name                 Type
====                 ====
Dropbox              dropbox
OneDrive             onedrive
TeraCLOUD            webdav

e) Edit existing remote
n) New remote
d) Delete remote
r) Rename remote
c) Copy remote
s) Set configuration password
q) Quit config
e/n/d/r/c/s/q>
使用方法
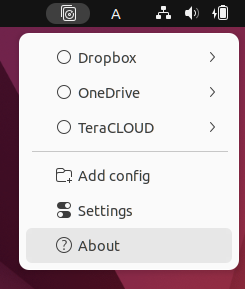
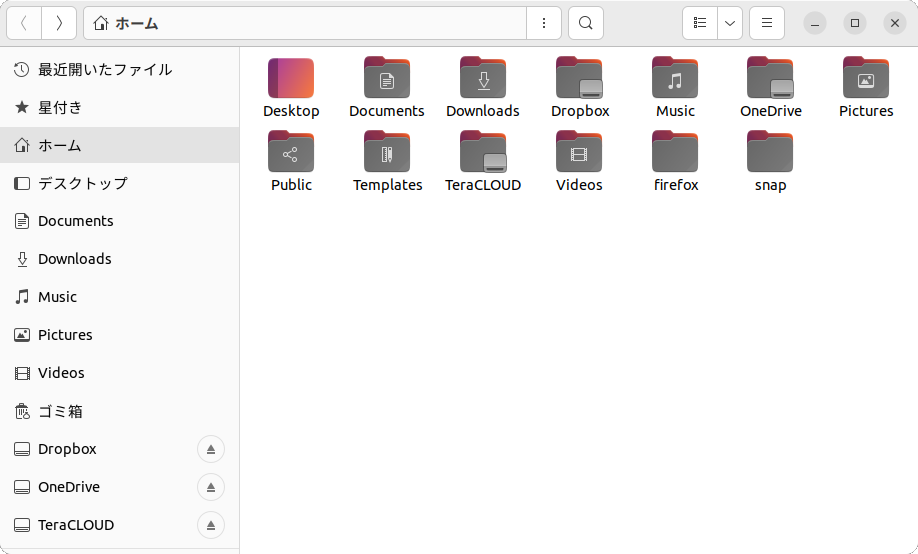
設定が完了し右上のドライブアイコンをクリックすると、さきほど入力した名称でサービスが追加されています
基本的な使い方
基本的な使い方は登録してあるサービスのドロップダウンメニューで
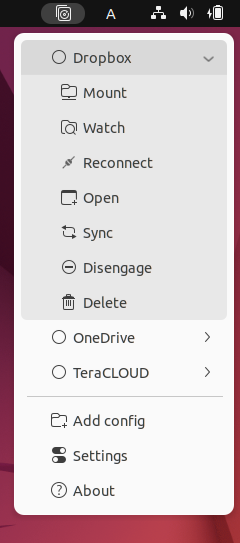
rclone-managerのマニュアルをよく読むと、現在使用できるのは
rclone-managerの設定
rclone-managerにも設定があります。
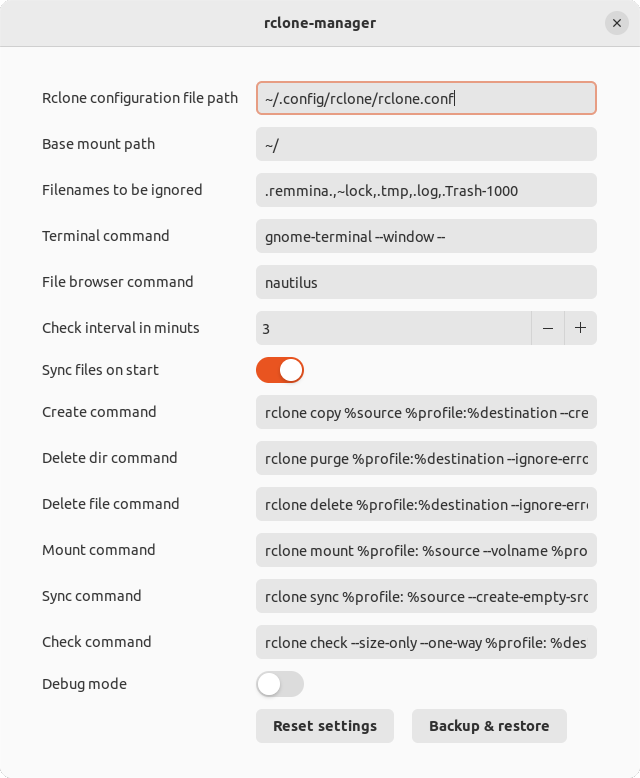
Rcloneの細かいコマンドのオプションなどが設定できます。何か好みのコマンドオプションがあったらここに追加してみてください。
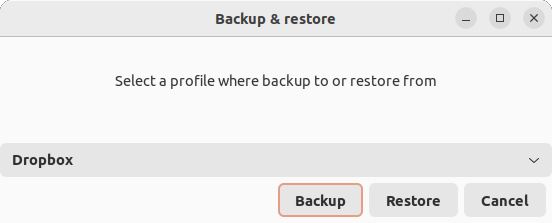
また一番下には
バックアップまたはリストアしたいサービスを選択し、
Rcloneのアップデート
前述のとおりアップデートはコマンドラインから行えます。次のコマンドを実行してください。
$ sudo rclone selfupdate
アップデートがない場合は次のように表示されます。
2022/07/23 17:44:29 NOTICE: rclone is up to date
アップデートがある場合は、しばらく待ったあと次のように表示されます。
2022/07/23 17:44:19 NOTICE: Successfully updated rclone from version v1.58.1 to version v1.59.0
もちろん結果はいずれも例です。
Rcloneとrclone-managerのアンインストール
アンインストールは、まずExtension Managerでrclone-managerを削除します。続けて次のコマンドを実行してください。
$ sudo rm /usr/bin/rclone
$ sudo rm /usr/local/share/man/man1/rclone.1
$ sudo mandb